Global freight moves fast, and the people touching your cartons rarely speak the same language as your packing team. That is why international logistics pictograms matter, they tell handlers what to do in a split second.
If you ship outside your home market, you have probably seen boxes arrive upside down, crushed at the corner, or soaked after sitting on a wet dock. Clear handling symbols and consistent package markings cut down those avoidable mistakes.
Good pictograms are not decoration, they are operational instructions that survive customs scans, cross docks, and warehouse reshuffles. When you treat shipping labels like a system instead of an afterthought, damage rates drop and claims get easier to defend.
Why standardized handling pictograms reduce damage and delays
Standardized symbols work because they remove interpretation, a handler does not need to read English, Spanish, or Mandarin to understand a wine glass icon. In busy terminals, people rely on quick pattern recognition, so familiar handling symbols get followed more often.
Damage often starts with one bad move, like grabbing a carton by a taped seam or clamping a crate where the product sits. International logistics pictograms push the right behavior upstream, before the first forklift lift turns into a claim.
Delays are tied to uncertainty, and uncertainty makes workers stop and ask, or worse, guess. When package markings clearly show orientation, stacking limits, and environmental limits, freight flows through cross docks with fewer exceptions.
I have seen warehouses treat unlabeled cartons as generic freight, which usually means they get stacked hard and moved fast. The same SKU with proper shipping labels gets staged separately, handled by the corners, and kept off damp floors.
Standardization also helps when multiple vendors pack the same product family, because your carrier sees the same visual language every time. When the symbols and placement stay consistent, training becomes easier and compliance becomes more automatic.
Claims investigations move faster when the carton clearly communicated the required handling at the time of shipment. A clean pictogram set on the outer pack makes it obvious whether the right instructions were provided and whether they were ignored.
Another overlooked benefit is fewer repacks at transit hubs, because clear markings reduce the need for someone to open a carton to confirm orientation or contents. Every time a box gets opened and re-taped, you introduce new weak points and new chances for loss.
Standard symbols also reduce the “special case” pile that forms in many terminals when freight looks risky or confusing. When a carton looks understandable at a glance, it is more likely to stay in the normal flow instead of waiting for a supervisor.
Even when people do not follow symbols perfectly, a recognizable pictogram can still nudge behavior in the right direction. A handler may not baby a carton marked fragile, but they might avoid tossing it onto a hard edge.
Delays are not only about damage, they are also about compliance checks, inspections, and rework. Clear package markings reduce the number of questions at receiving, which keeps your customer from holding freight while they sort out what it is and how it should be stored.
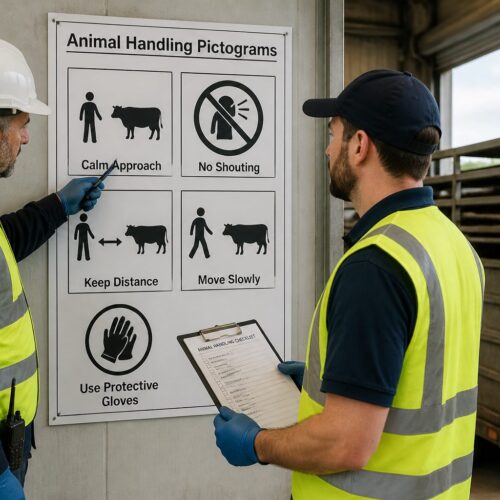
The most common logistics pictograms and what they mean
Most handling symbols boil down to a few themes, orientation, fragility, moisture, temperature, and mechanical handling limits. If you can only print a small set, start with the icons that prevent irreversible damage for your product.
“This way up” arrows are basic, but they matter for liquids, compressors, and any product with a suspended component. If the arrows are missing or tiny, cartons get tipped during pallet build and the inner packaging takes the hit.
The umbrella symbol tells crews to keep a shipment dry, which includes covered staging and avoiding open truck doors in rain. It sounds obvious, yet a clear umbrella on the carton changes behavior in a yard where everything else looks the same.
The “do not stack” symbol is common on products that crush easily, but it is also one of the most ignored when space is tight. If you use it, you need a plan for how carriers and receivers will actually store the freight without stacking.
Stacking limit symbols, often shown as a number with a weight or a set of boxes, are more realistic than a blanket “do not stack.” They tell a warehouse exactly how much top load is acceptable, which helps when pallets are double-stacked in trailers.
The “keep away from heat” icon is useful for adhesives, cosmetics, certain chemicals, and batteries that degrade or become unstable at high temperatures. It also signals to avoid placing the load near reefer units, heaters, or sun-baked container walls.
Temperature range pictograms are helpful when you ship products that must stay within a specific band, like certain diagnostics or specialty materials. They work best when the range is realistic for your mode, because a symbol cannot replace a proper cold chain.
The “do not use hooks” symbol matters for bags, textiles, and any carton that can be punctured by a metal hook. It is a simple way to prevent hidden damage that only shows up when the customer opens the package.
Center of gravity marks are critical for tall crates, heavy machinery, and uneven loads that can tip during lifting. When riggers can see the balance point, they can position forks or slings correctly instead of guessing.
“Sling here” and “forklift here” symbols guide mechanical handling so the load is supported where the structure is strongest. Without them, operators lift where it is convenient, which can crack skids, bend frames, or crush product inside.
For electronics, the ESD symbol is a reminder that static control matters even before the box is opened. It signals that the receiving team should use grounded workstations and proper bags, not just handle the carton carefully.
Some pictograms are about human safety as much as product safety, like “heavy package” or “team lift.” If your cartons are over common manual handling limits, these icons reduce injuries and reduce the chances of a drop caused by a strained lift.
It helps to remember that pictograms are not a full instruction manual, they are quick cues. The best icons are the ones that match what a handler can realistically do in the moment, with the equipment they have.
Choosing the right pictograms for your product and packaging
Picking international logistics pictograms should start with a risk list, what failure ruins the product, and what failure only scuffs a box. Your handling symbols should target the top risks, not every possible hazard.
Match symbols to the way the load really moves, parcel networks, LTL terminals, ocean containers, or air cargo ULDs all stress packaging differently. If the route includes clamp trucks, you need package markings that indicate clamp points or “do not clamp” where appropriate.
Start with the product’s weak points and work outward to the packaging, because the carton is only a tool to protect what is inside. If a product fails from vibration, a “fragile” icon will not solve it, but it can support a design that includes proper cushioning and bracing.
Think about what a handler can control versus what they cannot, because symbols should focus on controllable behaviors. A warehouse can keep a pallet upright and dry, but it cannot guarantee a perfect temperature if the freight sits on a hot dock for a day.
It also helps to separate product sensitivity from packaging strength, because a strong crate can tolerate rough moves even if the product is delicate. In that case, fewer symbols may be better, since the packaging already absorbs the normal abuse of the route.
When you ship multiple pack sizes, choose pictograms that scale across them without changing meaning. A symbol set that works on a small carton but disappears on a large palletized load is not really standardized.
Consider the receiving environment, because some customers break down pallets immediately while others store them for weeks. If your customer stores pallets outdoors under tarps, “keep dry” and clear pallet wrap practices become more important than they would be for indoor storage.
Use your own damage data to guide decisions, because intuition often misses the real failure mode. If most returns show crushed corners, prioritize stacking and clamp guidance over adding more fragile icons.
Be honest about what your packaging can withstand, because symbols do not create protection by themselves. If you mark a carton “fragile” but ship it in single-wall corrugate with minimal cushioning, you are asking the carrier to do what your packaging did not.
For regulated products, align pictograms with any required markings so the carton does not look contradictory. Even when a pictogram is not legally mandated, it should not interfere with compliance labels or make them harder to see.
Finally, think about training, because your own team needs to apply the symbols consistently. A perfect pictogram plan fails if packers place labels randomly or use different versions depending on what is in the drawer.
| Product or packaging scenario | Recommended pictograms | Reason to use them |
|---|---|---|
| Medical devices with foam inserts | Fragile, This way up, Keep dry | Protects calibrated parts and prevents moisture exposure during staging |
| Liquid chemicals in inner bottles | This way up, Keep away from heat, Keep dry | Reduces leaks from inversion and limits temperature driven pressure changes |
| Heavy machinery in a wooden crate | Center of gravity, Sling here, Do not stack | Prevents tip overs and avoids top loads that crush blocking and bracing |
| Electronics with ESD sensitive boards | Fragile, Keep dry, ESD symbol | Signals careful handling and reinforces static control requirements |
| Glass bottles in partitioned cartons | Fragile, This way up, Do not use hooks | Stops punctures from hooks and reduces side impacts during transfers |
Use the table as a starting point, then adjust based on your actual packaging tests and field feedback. If you change materials or suppliers, revisit the pictogram set because the risk profile can shift quickly.
When in doubt, choose the symbol that prevents the most expensive failure, not the most common minor issue. A small scuff might be acceptable, but one leak or one cracked component can wipe out the margin on the entire shipment.
Placement rules: where symbols work best on cartons and crates
Symbol placement decides whether anyone sees the message before they move the load. Put key handling symbols on at least two adjacent sides of a carton, so a pallet wrap or a tight stack does not hide them.
For “this way up” arrows, align them with the actual product orientation, not the easiest print direction on the box. I have watched teams rotate cartons to match arrows, then load them wrong because the inner pack was built differently.
Keep pictograms away from seams, hand holes, and heavy tape, because those areas get torn or covered during packing. A symbol split by a box joint looks sloppy and crews tend to ignore sloppy shipping labels.
On crates, place package markings near lifting points and near the main opening side, since that is where riggers and inspectors stand. If a symbol is only on the top, it disappears once crates are stacked or stored under racking.
Think about how the carton is presented during each move, because the visible face changes from pick to pack to pallet to trailer. A symbol that is perfect on a single carton can vanish when the cartons are turned inward on a pallet pattern.
For palletized loads, consider adding duplicate pictograms to the stretch wrap label or a pallet placard. This helps when individual carton markings are hidden by corner boards, straps, or opaque wrap.
Keep a clean “label zone” on the carton where shipping labels and handling symbols live together without overlap. When barcodes, addresses, and pictograms fight for space, the result is usually a panel that nobody trusts.
Orientation symbols should be placed so they read correctly when the carton sits on its base, not when it is on its side during packing. If the icon looks rotated, handlers may assume the carton is already upside down and “correct” it the wrong way.
On long crates, repeat critical symbols along the length so they remain visible even if one end is blocked. A single set of markings at one corner is easy to miss when the crate is staged against a wall.
Do not place pictograms directly under strapping, because straps can obscure the icon and can also cut into labels over time. If you must strap over a marked area, use a rigid placard or print directly on the substrate.
For reusable totes and returnable packaging, placement needs to survive multiple cleaning cycles and relabeling events. In those systems, embossed markings or durable plates often outperform stickers that peel after a few turns.
Finally, check placement after the carton is fully packed, taped, and weighed, because real packout introduces real obstruction. A five-minute walkaround at the end of the line can prevent months of recurring damage.
Size, print quality, and durability for real-world shipping
A tiny icon may meet your internal checklist, but it fails in a dim warehouse at 3 a.m. Print handling symbols large enough to read from a few feet away, especially for orientation and stacking limits.
Contrast matters more than fancy design, black on brown kraft works if the ink is dense and the lines are clean. If you use color, keep it consistent across shipping labels so workers learn the pattern quickly.
Durability is where many programs fall apart, because labels smear, tear, or peel when cartons sweat in humid containers. Use stock and adhesive rated for your route, and test it with cold rooms, rain exposure, and abrasion from pallet wrap.
Direct printing on cartons can be cheaper and often survives scuffs better than paper labels, but only if your printer is maintained. A worn print head turns crisp international logistics pictograms into fuzzy blobs that look like random ink.
Size is also about distance and speed, because handlers often see a carton while moving, not while standing still. If a forklift operator cannot recognize the symbol while approaching a pallet, the symbol is not doing its job.
Choose line weights that survive low-cost printing and rough surfaces, because thin lines disappear on corrugate flutes and textured wood. A bold, simple pictogram usually outperforms a detailed one in the real world.
Smudge resistance matters for thermal labels, especially when cartons rub against each other in a trailer. If your icons wipe off with a thumb, they will not survive a multi-leg export route.
Water resistance is not just about rain, it is also about condensation and wet floors. Cartons can pick up moisture from a cold container door opening, and that moisture can soften paper labels until they tear.
Abrasion is a bigger enemy than most teams expect, because stretch wrap and straps act like sandpaper over time. If your route includes vibration and long transit, assume constant rubbing and pick materials accordingly.
For crates and heavy shipments, consider stenciling or using rigid placards that are bolted or strapped on. A paper label on raw wood often fails quickly, especially if the crate is stored outdoors before loading.
Print quality should be checked as part of routine line startup, not only when someone complains. A simple go/no-go sample board with acceptable icon examples can keep your shipping labels consistent across shifts.
If you outsource packing, specify minimum icon size and print method in the packing SOP. Without a written standard, vendors will optimize for speed and cost, and your pictograms will be the first thing to degrade.
Durability also includes UV exposure for freight that sits in open yards or on airport ramps. Some inks fade fast in sunlight, and a faded “this way up” icon is almost worse than none because it looks like noise.
Avoiding mixed messages when you combine multiple pictograms
Too many symbols on one panel makes people tune out, because it looks like clutter instead of instruction. Choose the few handling symbols that change behavior, then support them with packaging that can take normal abuse.
Conflicts happen more often than shippers admit, like “stacking limit” next to a pallet pattern that forces stacking anyway. If your warehouse builds double stacks in the trailer, do not print “do not stack” unless you can enforce it.
Order and grouping help, put orientation icons together, then environmental icons, then mechanical handling icons. When package markings follow a consistent layout, crews scan them like a dashboard instead of reading each one.
Be careful with custom icons, because they look official but may mean nothing to a carrier in another country. If you must add a special instruction, keep it separate from standard international logistics pictograms and pair it with plain text on the shipping label.
Mixed messages also show up when the carton says one thing and the pallet says another, like “keep dry” on cartons but no protection on the pallet. Handlers trust what they see in front of them, so your unit load needs to support the message.
Another common problem is printing “fragile” on everything, which trains workers to ignore it. If every carton is marked fragile, then none of them stand out, and you lose the ability to signal true exceptions.
Be consistent with symbol versions, because small design changes can create confusion across sites. If one plant uses a different arrow style or a different umbrella icon, carriers may not recognize it as quickly.
Do not rely on pictograms to override physical cues, because the physical cues usually win. A thin, flimsy carton covered in warning icons still looks like something that will not survive, and it may get treated as a problem shipment.
When you combine symbols, think about priority, because handlers will not follow ten instructions at once. Put the most critical instruction in the most prominent position and make the rest secondary.
Some symbols are redundant when used together, like “fragile” plus “handle with care” plus “glass,” and redundancy adds noise. A clean set of two or three icons can be more effective than a wall of warnings.
If you need to communicate a strict requirement, support it with packaging design features like tilt indicators, shock indicators, or physical blocking. Pictograms can guide behavior, but evidence and enforcement are what change outcomes.
Finally, review your symbol set with the people who actually pack and load, because they will spot contradictions fast. If the team laughs at a symbol because it is impossible to follow, that symbol is already dead.
Building a pictogram set that matches real carrier handling
Start by mapping touch points, packout table, palletizing, pickup, terminal sort, customs inspection, delivery truck, and receiving dock. Each touch point has its own failure modes, so your handling symbols should target the steps where damage actually starts.
Parcel carriers treat cartons like units in a flow system, so “fragile” alone rarely changes drop height. In parcel, you get better results by improving cushioning and using package markings that prevent inversion for liquids or powders.
LTL freight has more forklift moves and more re-stacking, which makes clamp and fork guidance more useful. If your cartons cannot be clamped, put that message where a clamp operator can see it before they squeeze.
Ocean freight adds time and moisture, and long dwell times make “keep dry” and desiccant instructions worth printing. If you ship through tropical ports, assume condensation, then make your shipping labels and outer pack survive it.
Air freight is fast, but it includes tight build schedules and dense ULD packing, which creates compression and puncture risks. A “do not stack” icon may not be realistic in that environment, but clear orientation and lift-point guidance can still help.
Rail moves can add long vibration exposure, especially for intermodal containers. If vibration loosens internal fasteners or causes abrasion, focus on internal packaging improvements and use pictograms to prevent the worst handling errors.
Customs inspections are a special touch point, because cartons may be opened and reclosed by people who do not know your packing method. Clear “open here” and “repack instructions” in plain text can pair well with standard pictograms to reduce sloppy re-taping.
Build your pictogram set with your carrier’s actual equipment in mind, not a generic warehouse fantasy. If your carrier uses clamp trucks by default, your packaging and markings need to either support clamping or clearly prohibit it.
Ask for feedback from your 3PL or freight forwarder, because they see patterns across many shippers. They can tell you which symbols get noticed and which ones disappear into the visual noise of a busy dock.
It helps to create a one-page standard that shows the approved icons, their meaning, and their placement rules. When everyone uses the same reference, you avoid the slow drift that happens when teams copy old cartons and improvise.
Consider running a small pilot before a full rollout, because pictogram changes can have unintended effects. A new label layout might improve handling but interfere with scanner placement, which can create delays if barcodes are harder to read.
Measure results with simple metrics like damage rate, exception handling notes, and customer complaints tied to handling. If the numbers do not move, either the symbols are not visible, not understood, or not supported by packaging strength.
Keep the set stable once it works, because constant changes retrain the entire chain and reduce recognition. Standardization is only real when the same icon means the same thing month after month, across every lane.
Quick checklist for auditing your shipping labels before export
A label audit is boring, but it catches the small stuff that causes big headaches at scale. Run the audit on a packed carton, not on a flat blank, because tape, wrap, and straps change what people can see.
Use the same audit across SKUs so your team stops reinventing decisions every week. If you document why each symbol is there, you also make it easier to defend your package markings during a damage claim.
Build the audit into your normal quality checks, not as a special event before a big shipment. If you only audit when you are nervous, you will miss the slow creep of bad habits on the packing line.
Include a quick visibility test, where someone stands a few feet away and confirms they can identify the key pictograms without squinting. If the symbols are not obvious at a glance, they will not be obvious on a dock.
Check for label overlap, because shipping labels, compliance labels, and handling symbols tend to collide when carton sizes change. One hidden icon can be the difference between an upright shipment and a pallet of returns.
Verify that the same symbol set appears on every carton in the shipment, not just the first one packed. Inconsistent markings create inconsistent handling, and inconsistent handling produces inconsistent damage patterns that are hard to diagnose.
Audit after palletizing as well, because pallet patterns can hide the best-placed carton markings. If the pallet hides everything, add a pallet-level placard so the instructions survive unitization.
- Primary handling symbols printed on two adjacent sides
- Orientation arrows match the inner pack orientation
- Symbols not placed on seams, tape paths, or hand holes
- Legible contrast on brown kraft and shrink wrap glare
- Adhesive and ink tested for humidity and cold storage
- No conflicting icons like “do not stack” with stackable pallet patterns
- Consistent layout across SKUs and carton sizes
Keep a record of audit results, even if it is just photos and a short note, because it helps you spot trends. When damage spikes on a lane, you can compare current cartons to the last “good” run and see what changed.
If you use multiple facilities, share the same checklist and sample photos across all sites. A single standard across locations is one of the fastest ways to reduce variability in international shipping outcomes.
Conclusion
International logistics pictograms work when you treat them as part of the packaging design, not as last minute stickers. The best handling symbols are clear, consistent, and backed by packaging that can survive the route.
Good shipping labels and package markings reduce damage, speed up handling, and give you cleaner conversations with carriers when something goes wrong. If you standardize your symbol set and enforce placement and print quality, your cartons start arriving like they should.
When you take pictograms seriously, you also reduce internal chaos, because packing teams stop guessing and start following a repeatable standard. That consistency shows up in fewer reworks, fewer customer complaints, and fewer “we always do it differently” debates.
The goal is not to label everything, it is to communicate the few instructions that protect the product and keep freight moving. If you keep the symbols simple, visible, and durable, you give every handler a better chance to do the right thing.