Walk through a modern factory, a hospital corridor, or a busy airport, and you will see the same safety graphics repeated like a shared language. That consistency is the point, and ISO 7010 is one of the main reasons it works.
People ask for an ISO 7010 pictograms list because they want to know what a symbol means before they gamble on a guess. I like that impulse, because safety signs should reduce uncertainty, not add to it.
This guide focuses on the main ISO safety signs you will encounter, how the codes work, and how standardized symbols shape sign design decisions. If you manage a site, ship goods, or write procedures, you will get more value from the signs when you understand the system behind them.
What ISO 7010 covers and where you’ll encounter it
ISO 7010 is the international standard for graphical symbols used on safety signs, especially for hazards, mandatory actions, prohibitions, safe conditions, and fire equipment. It sets the symbol artwork so a sign in Chicago can look meaningfully like a sign in Seoul.
It is not a general branding guide or a decorative icon set, and that distinction matters when you are tempted to “clean up” a symbol to match your company style. The point is recognition under stress, not aesthetic novelty.
ISO 7010 is often used alongside other standards that address layout, materials, and placement, which is why you may see it referenced in broader safety sign specifications. The pictogram is the core message, but the sign still has to survive the real environment it is posted in.
You will see ISO 7010 pictograms in workplaces, public buildings, transportation hubs, and construction sites, often paired with local language text. The pictogram carries the fast message, and the words handle the details like scope, exceptions, or contact numbers.
In mixed-language environments, the pictogram can be the only part everyone fully shares, especially with visitors, contractors, and temporary labor. That is why consistent symbols are not just a compliance checkbox, but a practical operational tool.
Hospitals and clinics lean on standardized symbols because people are already stressed, distracted, or unfamiliar with the building. A clear “emergency exit” or “first aid” symbol reduces the time it takes to make a safe decision.
Airports and rail stations use these signs because foot traffic is constant and the audience changes every minute. Even when the building is huge, the symbols help create a predictable wayfinding rhythm.
Warehouses and logistics facilities rely on these standardized symbols because they reduce training time for temporary staff and contractors. When a forklift lane, eyewash station, or emergency exit looks familiar, people react faster under pressure.
Manufacturing sites benefit because the same hazard repeats across machines and lines, and the same symbol can anchor a consistent safety message. That consistency also helps supervisors spot missing signage during routine checks.
Construction sites are a special case because the layout changes, which can make sign plans drift out of date quickly. Standard pictograms help, but they still need frequent review as access routes and hazards move.
ISO 7010 also matters in sign procurement, because vendors can verify they are printing a registered symbol instead of inventing a lookalike. If your sign design drifts from the standard, you may create a symbol that looks official but communicates poorly.
Procurement teams like ISO codes because they make it easier to order replacements without attaching screenshots and hoping the supplier interprets them correctly. A code on a purchase order is faster than a long email thread about what “the green running man sign” should look like.
Auditors and safety managers also use the standard as a reference point when they review signage during inspections. If a sign is nonstandard, they can flag it without debating personal preferences.
For global organizations, ISO 7010 reduces the friction of rolling out a unified safety program across multiple sites. You still need local compliance checks, but you do not have to reinvent the symbol language from scratch each time.
How ISO pictograms are organized (types and codes)
ISO 7010 groups safety symbols by sign type, and each type has a distinct shape and color convention that people learn quickly. That visual grammar is why a red circle feels like “stop,” while a green rectangle feels like “go here” or “this is safe.”
Those shape and color rules are doing as much work as the icon itself, because they let you identify the category from across a room. Even when you cannot read the details, you can often tell whether a sign is forbidding, requiring, warning, or guiding.
When organizations mix categories on one panel without clear separation, they can accidentally create a confusing hybrid message. A prohibition symbol next to a mandatory symbol needs enough spacing and structure that the viewer does not blur them together.
The standard also assigns alphanumeric identifiers, which is how you can reference a symbol precisely in specs, audits, and purchase orders. In practice, the code is the cleanest way to avoid misunderstandings when different teams talk about “the same” sign.
Codes are also useful when you maintain a sign register, because you can track what is installed, where it is installed, and when it was last reviewed. That turns signage from a one-time project into a maintained asset.
If you have ever tried to standardize signs across multiple buildings, you know how quickly small variations multiply. A code-based list gives you a way to say, “we use this exact symbol everywhere,” and then enforce it.
You will commonly see codes like P for prohibition, M for mandatory action, W for warning, E for safe condition, and F for fire safety equipment. Once you know that pattern, an ISO 7010 pictograms list becomes easier to scan and maintain.
The letters are not just labels, because they reflect how people interpret the sign in the moment. A person may not remember the code, but they will remember that red means stop and green means exit.
In documentation, the code helps you avoid vague language like “post a warning sign near the chemical area.” A better instruction is “install W016 at the entrance to the chemical storage room,” because it is testable.
These codes do not replace good placement, lighting, and sizing, and people forget that part too often. A perfectly standardized symbol mounted behind a door or above a cluttered bulletin board is still a bad sign.
Size matters because a sign that is readable from one meter may be useless from five meters, and many hazards are noticed at a distance. If you expect people to react while walking, driving, or pushing carts, the sign has to be designed for that speed.
Lighting matters because a sign that is clear at noon can disappear at night, in smoke, or in a power outage. If the sign is critical for evacuation or emergency response, consider illumination and backup power as part of the sign system.
Consistency matters because people build mental maps, and inconsistent sign placement breaks those maps. If one stairwell has the exit sign above the door and another has it on the side wall, you slow people down when they can least afford it.
When you create internal templates for signs, it helps to lock the pictogram artwork and only allow changes to supporting text. That approach keeps your designs aligned with ISO 7010 while still letting you add site-specific details.
Prohibition symbols: what they tell you to stop doing
Prohibition signs use a red circular band with a diagonal bar, and they tell you to stop an action that creates risk. They are blunt on purpose, because “do not” messages fail when they sound negotiable.
They also work well because they are fast to parse, even if someone only catches them in the corner of their eye. The red ring and slash is a visual shortcut to “this action is not allowed here.”
In an ISO 7010 pictograms list, prohibition symbols often cover smoking, open flames, unauthorized entry, and switching devices on or off. You see them near fuel storage, oxygen use areas, battery charging zones, and controlled access rooms.
Some sites use prohibition signs to control behaviors that create secondary risks, like eating or drinking in labs or production areas. The goal is not to police people, but to prevent contamination, ingestion hazards, and accidental chemical exposure.
Unauthorized entry signs are common in places where the hazard is not obvious, like electrical rooms or server rooms. A closed door looks harmless, so the sign has to carry the seriousness of what is inside.
Mobile phone prohibitions tend to confuse people unless the reason is clear, because phones are now part of normal work. If the risk is ignition, interference, or privacy, it helps to pair the pictogram with short explanatory text.
One mistake I see is using a prohibition sign where a mandatory sign would be clearer, like “no entry without eye protection.” That message is better expressed as a requirement to wear eye protection, because it tells people what to do, not just what not to do.
Another mistake is stacking too many prohibitions at one doorway, which turns the entrance into a wall of red circles. When everything is forbidden, people stop reading and start guessing.
If you need multiple prohibitions, prioritize the highest-risk behaviors and consider whether some rules belong in training or procedures instead of on the door. Signs are best when they communicate the few actions that cause the biggest harm.
Prohibition signs also need enforcement and environmental support, because people notice hypocrisy quickly. If you post “no smoking” next to an overflowing ashtray, the symbol becomes background noise.
In an audit, check whether the prohibited action is physically possible in that location, because sometimes the hazard has been removed but the sign remains. Old signs can create confusion when they contradict what people see.
| ISO 7010 code | Common name | Where you typically see it |
|---|---|---|
| P001 | No smoking | Fueling areas, loading docks, chemical storage |
| P003 | No open flame | Solvent rooms, paint booths, gas cylinder cages |
| P006 | No access for unauthorized persons | Electrical rooms, server rooms, restricted labs |
| P020 | Do not use mobile phones | Explosive atmospheres, blasting zones, some hospitals |
| P023 | Do not touch | Hot surfaces, moving machinery guards, test rigs |
When you use a table like this internally, it helps to add your own location list so maintenance teams can verify signage during rounds. A simple map reference or door number can turn a symbol list into an actionable checklist.
If you are updating signs, confirm that the pictogram version matches ISO 7010 and not an older or regional variant that looks similar. Small differences in hand position, flame shape, or device outline can affect recognition.
It is also worth checking whether the prohibition is supported by policy and training, because a sign without a rule behind it is hard to defend. People comply more consistently when the sign reflects a real, explained requirement.
Mandatory action symbols: what you must do
Mandatory action signs are the ones with a blue circle, and they tell you what you must do to enter or work safely. If prohibition signs are a hard “no,” mandatory signs are a hard “yes.”
The blue circle is useful because it reads as instruction rather than danger, which helps keep people calm and focused. It is essentially a quick visual cue that says, “here is the required behavior.”
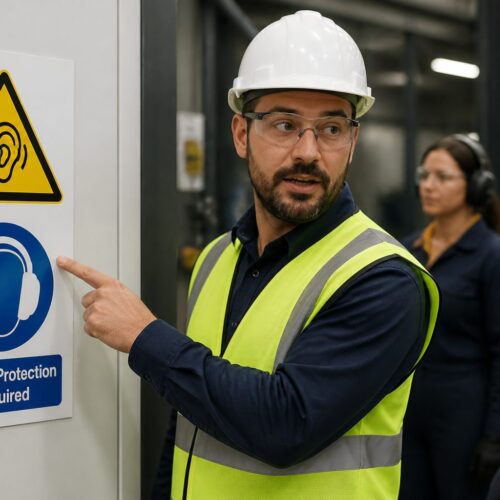
The most common mandatory symbols cover PPE like safety glasses, hearing protection, hard hats, and gloves. You also see them in process areas for actions like washing hands, using a safety harness, or disconnecting power before service.
PPE signs work best when the PPE is actually available at the point of use, because people will not walk across a building to find earplugs. If you want compliance, pair the sign with dispensers, storage hooks, or a clear issue process.
Mandatory handwashing signs are common in food handling, healthcare, and clean manufacturing, where the risk is contamination rather than immediate injury. They are also a reminder that safety includes hygiene and product integrity, not just hard hats.
Lockout and isolation-related symbols can be tricky, because the action may require training and multiple steps. In those cases, the pictogram should reinforce a procedure, not replace it.
I have seen companies overuse mandatory signs as a substitute for supervision, and it backfires when walls turn into blue wallpaper. Use them where the requirement is consistent and defensible, not where it changes by task or by day.
Overuse also creates a credibility problem, because people start to treat every instruction as optional noise. If you post “wear gloves” everywhere, workers will assume it is generic and ignore it where it truly matters.
Another common issue is posting mandatory PPE signs in areas where the hazard assessment does not support the requirement. If the rule feels arbitrary, people will test boundaries and compliance will drop.
Good sign design pairs the mandatory pictogram with placement that matches the decision point, like at the entrance to a grinding area rather than inside it. If you want compliance, put the symbol where people still have a chance to grab the gear.
It also helps to align the sign with physical cues, like PPE stations, floor markings, or gates that slow people down. When the environment reinforces the message, the sign feels less like nagging and more like guidance.
For visitors, a mandatory sign can be the first hint that they have entered an industrial space with different rules. If you host tours, contractors, or delivery drivers, consider a clear entry point where the key mandatory signs are unavoidable.
When you write procedures, reference the ISO code for the mandatory symbol so the document and the physical sign stay in sync. That small detail prevents the common drift where the procedure changes but the wall sign does not.
In training, it is worth explaining not just what the symbol means, but why it is required in that area. People comply more reliably when they understand the hazard the PPE is controlling.
If you run a multi-site operation, standardizing mandatory signs can also standardize expectations for employees who move between locations. That reduces the “I thought it was optional here” problem that shows up after transfers.
Warning symbols: how to spot hazards quickly
Warning signs use a yellow triangle with a black border, and they point to a hazard you need to notice before you proceed. These are the signs that make you slow down and look around.
The triangle shape is a strong attention cue, which is why it is used for hazards across so many systems. It signals that the environment has a risk you need to actively manage.
Common ISO safety signs in this group cover electric shock, forklifts, overhead loads, corrosive substances, and slippery surfaces. On a good day, they prevent incidents, and on a bad day, they can keep a near miss from turning into a serious injury.
Electric shock warnings are often posted on panels, cabinets, and equipment housings, but they can be missed if the panel is cluttered with unrelated labels. Keeping the area around the warning sign visually clean improves its impact.
Forklift and vehicle warnings are common in warehouses where pedestrian and vehicle routes intersect. They are most effective when paired with floor markings, mirrors, speed controls, and clear right-of-way rules.
Overhead load warnings are a reminder that the hazard can come from above, which people naturally forget when they are focused on what is in front of them. In crane bays and lifting zones, repeating the warning at entry points helps.
Chemical warnings can overlap with labeling systems on containers, so it helps to be clear about what the sign is warning about. A room might require both hazard communication labels and a warning sign that alerts people before they enter.
Warning pictograms work best when they are specific and placed close to the hazard, not at some generic “safety board” by the time clock. If the hazard moves, like a forklift route, you need a marking plan and repeated signs, not a single triangle at the entrance.
Specificity also matters because “general danger” triangles can become meaningless if they are used everywhere. If you can identify the actual hazard, use the pictogram that names it.
Placement should match the moment a person can still choose a safer path, not after they are already committed. A warning sign that appears only once you are inside the hazard zone is more like a post-incident explanation than a prevention tool.
Do not treat standardized symbols as a magic spell that makes risk disappear, because people still take cues from the environment. If a warning sign says “slippery surface” but the floor is always wet and no one fixes drainage, workers learn to ignore the triangle.
That is why warning signs should trigger corrective actions, not just awareness. If a hazard is permanent, consider engineering controls and redesign, and then use the sign as a final reminder rather than the primary control.
Another failure mode is using warning signs to compensate for poor housekeeping, like cluttered walkways or blocked exits. People quickly learn that the sign is there because the site is unmanaged, not because the hazard is unavoidable.
When you review your ISO 7010 pictograms list for warnings, check whether the symbols match the hazards people actually encounter. A warning sign that describes a rare hazard while ignoring a frequent one is a sign plan that has lost touch with reality.
In some environments, you may need to consider viewing angles and movement speed, such as corridors with carts or outdoor yards with vehicles. A warning sign that is readable only when standing still may not work in a moving workflow.
If you rely on temporary warning signs during maintenance or construction, make sure they still use recognizable ISO-style pictograms. A handwritten note can help, but it should not be the only warning in a high-risk situation.
Safe condition and emergency symbols: exits and first aid
Safe condition signs are green, and they mark escape routes, emergency exits, first aid, and safety equipment locations. They answer the question people ask when something goes wrong, which is “where do I go right now.”
Green works well because it communicates permission and safety, which is the opposite of the stop-and-danger messages. In a stressful moment, that color contrast helps people separate guidance from warnings.
In an ISO 7010 pictograms list, you will see exit direction arrows, running man exit symbols, eyewash, emergency shower, and first aid cross icons. These symbols show up in offices and retail stores too, which helps visitors who have never stepped inside your facility.
Exit symbols are especially important in buildings with complex layouts, where the nearest exit is not the one you entered through. People tend to backtrack by instinct, and good exit signage gives them a better option.
Directional arrows are where consistency becomes critical, because a wrong arrow can send people deeper into a building. If you have ever seen conflicting arrows in the same corridor, you know how quickly confidence collapses.
Eyewash and emergency shower signs are not just about location, but about speed, because seconds matter after exposure. If the path to the unit is blocked, the green sign cannot compensate for the delay.
First aid symbols can also be used to mark trained first aiders, first aid rooms, or medical stations, depending on your setup. If you use the symbol for multiple meanings, clarify it with supporting text so people do not waste time.
Exit sign placement is where a lot of organizations get sloppy, because the sign looks fine during a quiet walkthrough. During a fire alarm with smoke, noise, and people moving fast, the sign needs clear sight lines, consistent arrows, and backup lighting.
It helps to walk the route at the height and angle people will actually see, including from wheelchairs or while carrying loads. A sign that is perfect for a standing adult may be hidden for someone lower to the ground.
In larger facilities, consider how signs work as a chain, where each one hands you off to the next decision point. A single missing sign can break the chain and cause people to hesitate or turn back.
First aid and AED symbols also need honest thinking about distance and access, not just compliance. If the AED is behind a locked door or the first aid kit is buried in a supervisor’s office, the green symbol becomes a cruel joke.
AED placement should account for response time, which means thinking about how long it takes to reach the device and return to the patient. If your building is large, one AED near reception may be technically present but practically ineffective.
Maintenance matters too, because a faded green sign or a missing arrow can be as harmful as no sign at all. Emergency signage should be part of routine checks, not something you notice only after an incident.
If you have multiple tenants or shared spaces, coordinate signage so the message is consistent across boundaries. A visitor does not know where one organization ends and another begins, and they should not have to.
For evacuation plans, safe condition symbols support the map, but they cannot replace it. A posted plan with clear routes and assembly points helps people confirm what the green signs are telling them.
When you update layouts, treat exit and first aid signage as part of the change process, not an afterthought. Renovations often create temporary corridors and doors, and the signage has to keep up.
Fire safety symbols: equipment and response cues
Fire safety signs are red, and they point to equipment like extinguishers, hose reels, fire blankets, and manual call points. They also help people identify fire response tools in places where the wall color and lighting make equipment hard to spot.
Red is chosen because it is strongly associated with fire and urgency, and it stands out in many environments. In an emergency, that immediate association reduces the time it takes to locate help.
These standardized symbols matter because fire equipment varies by country and building type, but the basic pictogram stays recognizable. When you train staff, you can point to the red symbol and connect it to the exact device on the wall.
They also matter for visitors and contractors, who may not know your building but can still recognize the equipment category. That recognition is valuable when seconds count and people are trying to help without creating more risk.
Fire extinguisher signs should be visible from the approach path, not only when you are standing directly in front of the unit. If the extinguisher is recessed or behind a column, the sign becomes the primary locator.
Manual call point signs are often overlooked because the device is small and blends into the wall. A clear red symbol helps people find the alarm quickly, especially in unfamiliar buildings.
Fire hose reel and hydrant-related signage is important in larger or older facilities where equipment may be spread out. If you expect trained staff to use it, the sign should make it easy to locate without searching.
One practical detail is keeping fire equipment areas free from storage, because boxes and pallets tend to migrate into any empty corner. A red sign above a blocked extinguisher is a common and avoidable failure.
Another detail is ensuring the sign indicates the equipment location accurately, especially when equipment is mounted on the side of a column or inside a cabinet. If the sign points to an empty spot, people will lose trust in the system.
Training should also cover which equipment people are expected to use and when to evacuate instead, because signage alone cannot teach judgment. A red symbol can help you find an extinguisher, but it cannot tell you whether the fire is safe to fight.
- F001 fire extinguisher location
- F002 fire hose reel location
- F003 fire ladder location
- F004 collection of firefighting equipment
- F005 manual call point location
- F006 fire emergency telephone location
If you keep a site register of fire equipment, aligning each asset with its ISO 7010 symbol makes inspections easier. It also helps new safety staff understand the building without relying on tribal knowledge.
Fire emergency telephone signs are a good example of why standardized symbols matter, because the device itself may not look like what people expect. The sign tells them, “this is the dedicated emergency line,” without needing a long explanation.
When you replace or relocate fire equipment, update the signs immediately, because wrong information is worse than no information. People will follow the sign first, and they may waste time before realizing it is outdated.
It is also worth checking whether your red signs remain visible after repainting, remodeling, or adding new fixtures. A sign that used to contrast can disappear if the background color changes.
In facilities with high noise, consider how people will coordinate during an alarm, because shouting directions is unreliable. Clear red equipment symbols reduce the need for verbal guidance when communication is difficult.
Conclusion
ISO 7010 works because it treats safety communication like a system, with consistent shapes, colors, and codes that people can learn once and reuse everywhere. When you keep an accurate ISO 7010 pictograms list for your site, you cut down on guesswork and sloppy substitutions.
That list is also a practical tool for maintenance, because it gives you a baseline for what should be installed and what should be replaced. When a sign fades, cracks, or disappears, you can restore it without redesigning from scratch.
The best ISO safety signs still need smart sign design, good placement, and a workplace that backs up what the symbols demand. If your signs match the standard and your environment matches the signs, people notice hazards faster and find help sooner.
If you want to improve your signage, start by walking the site as if you are new, then compare what you see to your procedures and your actual risks. The gaps you notice in that exercise are usually the same gaps that show up during emergencies.
Standardized pictograms are not about making a building look compliant, but about making decisions easier when time and attention are limited. When you treat signs as part of operations rather than wall décor, ISO 7010 becomes a real safety advantage.