Warehouses run on speed, but speed turns into risk when people cannot read the space at a glance. Clear pictograms for warehouse safety cut through noise, language barriers, and the bad habit of assuming everyone “knows the rules.”
I have walked sites where the floor tape looked great on day one and meant nothing by week three. A consistent sign system, placed where decisions happen, keeps aisles, docks, and racks from becoming a daily improv show.
Good symbology is not decoration, it is a working control that supports training and supervision. When the same icons appear on doors, posts, and equipment, people act faster and argue less.
This article focuses on practical placement and selection, not abstract design theory. The goal is to set up pictograms so a new hire, a visiting driver, and a seasoned forklift operator all read the message the same way.
The warehouse hazards pictograms need to address
Start by mapping hazards to real locations, because generic “be careful” signs get ignored fast. Walk the building and list where people make choices, like aisle entries, rack ends, dock edges, battery rooms, and compactor approaches.
Do the walk at different times, because a quiet aisle at 9 a.m. can be a traffic jam at 3 p.m. The hazards you need to signal are often tied to peaks, not averages.
Bring operators into the walk, because they know where visibility disappears and where loads shift. If you only map hazards from an office plan, you will miss the real pinch points created by daily storage creep.
Forklift and pedestrian conflicts are the top issue in many operations, but they are not the only one. Falling objects, pinch points, low headroom, and chemical exposure each need their own pictograms for warehouse safety, not a single catchall panel.
Think in terms of energy sources, because that is what hurts people in warehouses. Moving vehicles, gravity, stored mechanical force, electricity, and chemicals each deserve a clear visual warning that matches the risk.
Also consider less dramatic hazards that still cause recordables, like slips at dock plates, cuts at stretch wrap stations, and repetitive lifting at packing benches. If the same minor injury shows up every month, it deserves a pictogram and a process check.
Be honest about near misses, because that is where your sign plan should start. If your team keeps clipping rack uprights, you need impact zone pictograms and clear right of way cues, not another reminder poster in the break room.
Near miss data is especially useful when it includes time and location, because you can place signs where the pattern repeats. A single incident can be bad luck, but three close calls at the same cross aisle is a design problem.
Do not ignore damage reports, because they are a safety signal hiding in maintenance paperwork. If you are replacing dock bumpers, rack guards, or mirror mounts often, that area needs stronger visual controls and clearer icons.
Use a restricted area sign for places where entry control matters, like maintenance bays, high voltage panels, and automated storage equipment. If the boundary is real, mark it like you mean it with gates, floor markings, and the same icon repeated at eye level.
Make sure the hazard message is specific enough to change behavior, because “restricted” alone does not explain what goes wrong. Pair the restricted area pictogram with a simple hazard icon, like moving machinery or electrical risk, so people understand why the boundary exists.
Finally, check that your hazard list includes visitors and non routine work, because those people are the least familiar with your layout. Contractors, auditors, and drivers should be able to follow pictograms without needing a personal escort for every step.
Traffic and equipment pictograms for forklifts and pedestrians
Traffic pictograms work when they match the geometry of the building, so avoid copying a template that assumes wide, straight aisles. Put the first warning at the decision point, then repeat it after the blind corner so people do not relax too early.
Think about approach speed and sight distance, because those decide how early a person needs the message. If a forklift can appear from behind a rack end in one second, a sign ten feet back is already too late.
Use pictograms that show the movement, not just the object, because motion is the hazard. A forklift icon with a directional arrow communicates risk better than a lonely truck silhouette on a white background.
A forklift warning sign belongs where a pedestrian can still choose another route, not only where the forklift already has the right of way. I like to place one at every cross aisle entry, plus a second one at eye height on the rack end where the turning radius hides the truck.
Place the same warning on both sides of the intersection, because pedestrians and drivers approach from different angles. If only one side is marked, the unmarked approach becomes the “surprise” side and that is where the close calls happen.
Do not assume everyone is looking up, especially when they are scanning labels or carrying cartons. Eye level signs on posts and rack ends are often more effective than overhead banners that disappear into visual clutter.
Use separate pictograms for pedestrian route, forklift route, and shared crossing, because mixed messages cause standoffs. If you paint a crossing, add a pedestrian symbol on the floor and a matching wall sign so the intent stays obvious when pallets cover the paint.
Make the pedestrian route feel like a real route, not a suggestion, by repeating the icon at regular intervals. People follow what looks maintained, and they drift into equipment lanes when the “safe path” looks abandoned.
When you have shared crossings, add a simple yield or stop rule and stick to it everywhere. A consistent right of way pictogram reduces the awkward pauses where both parties assume the other will move first.
Speed limit and horn use icons can help, but only if supervisors enforce them and the facility design supports them. If you want slow traffic, narrow the visual field with bollards and clear lane edges, then back it up with a consistent forklift warning sign at the merge points.
Keep speed limit pictograms realistic, because an impossible number becomes a joke and then everything else loses credibility. If the dock approach is tight and busy, post a low limit there and a different limit in wide bulk aisles if needed.
Horn pictograms work best at specific triggers like blind corners and dock door approaches, not as a general “always honk” rule. If you ask for constant horn use, people tune it out and the sound stops meaning anything.
Include equipment beyond forklifts if it shares space, like pallet jacks, tuggers, and autonomous mobile robots. A pictogram plan that ignores new equipment types will lag behind operations and create mixed expectations.
Storage and racking pictograms that prevent handling mistakes
Racks fail in boring ways, like overloaded bays, off center pallets, and people storing the wrong SKU in a pick face. Pictograms for warehouse safety should make correct storage the default, especially for temp workers who do not know your product quirks.
Make it easy to do the right thing by putting the message where the hands and forks are, not where the paperwork lives. If the only capacity information is in a binder, the rack is effectively “unrated” on the floor.
Use pictograms to prevent “creative storage,” like leaning pallets against uprights or bridging gaps with broken boards. Those shortcuts often start as a one time fix and end up as a normal practice unless you visually block them.
Post load capacity and beam level limits where the operator can see them from the truck seat, usually on the upright at the aisle face. Pair capacity numbers with simple icons for max pallet count, no double stacking, and approved pallet type so the message survives a noisy shift.
Do not hide capacity labels behind stretch wrap, because that is exactly where people tend to stage overflow. If the rack face is constantly blocked, move the sign to the guard post or add a second copy higher up.
Use a consistent format for capacities, because operators should not have to decode different styles in different aisles. If some bays show pounds, others show kilograms, and some show “two pallets,” you are inviting confusion under pressure.
Mark special storage rules with icons, like “flammable,” “aerosols,” “keep upright,” or “do not clamp,” when those rules affect handling. If a product cannot be tilted or squeezed, the forklift operator needs that message at the pick face, not in the WMS notes.
For high cube zones, use pictograms that remind people about sprinkler clearance and stability. A simple “max height” icon prevents the slow drift where each shift stacks “just a little higher” than the last one.
Consider adding inspection cues, like a “report damage” pictogram at aisle ends, because rack damage is often seen first by operators. If you normalize reporting with a clear icon and a QR code or phone extension nearby, you catch problems before they become failures.
| Racking pictogram | What it prevents | Best placement |
|---|---|---|
| Max bay load (kg or lb) icon with number | Overloading beams and connectors | Upright at aisle face, eye level |
| No damaged pallet symbol | Stringer collapse and falling cases | Inbound staging and pallet exchange area |
| No climbing on racks icon | Falls and beam displacement | Rack end guards and ladder access points |
| Keep clear of sprinkler line symbol | Blocked sprinklers and fire code issues | Top beam level and high cube zones |
| Do not push pallets through icon | Back to back rack impacts and product drops | Push back and flow rack entries |
Use the table as a starting point, then customize it to your rack types, because selective rack, drive in, and flow rack fail in different ways. The pictogram that prevents a push through incident is not the same one that prevents a drive in upright hit.
When you change racking layouts, update pictograms at the same time, because old signs create false confidence. A capacity label that no longer matches the beam configuration is worse than no label at all.
Also think about the pick module and mezzanine areas, where people work on foot near stored loads. Falling object pictograms and “do not store above” icons can reduce the temptation to stash loose cartons on top of shelving.
Dock and loading zone pictograms that reduce incidents
Docks combine trucks, pedestrians, and uneven surfaces, so small misunderstandings turn into injuries. Put pictograms at the dock approach, on the leveler controls, and at the driver check in point so each person gets the message in their own workflow.
Think of the dock as a handoff between companies, because drivers may not share your training or language. Pictograms for warehouse safety are one of the few controls that can travel across that gap without a long explanation.
Separate “driver rules” from “employee rules” with placement, because drivers usually see the yard, the check in window, and the dock door area. If the driver only sees the sign after they are already backing in, you missed the moment that mattered.
A restricted area sign works well at the dock edge when paired with a physical barrier like a chain or swing gate. If you only post the sign, people step around it while carrying stretch wrap and they do not even notice they did it.
Use pictograms to reinforce “no step” zones near open dock doors, especially when trailers are not present. An empty door can look harmless, and that is when someone walks backward with a pallet jack and finds the edge too late.
Make sure the barrier and the sign agree, because mixed signals create shortcuts. If the chain is always unhooked, the restricted area sign becomes background noise.
Use clear icons for chock wheels, set trailer stand, and connect restraint, because written procedures do not travel with visiting drivers. If your site uses a light communication system, add pictograms that explain red and green states right where drivers can see them from the cab.
Place the restraint pictogram at two points: where the driver makes the decision and where the dock worker confirms it. A simple duplicate sign can prevent the classic argument where each side assumed the other handled the securement.
If you use dock locks, add a “do not pull” pictogram that is visible from the trailer nose and from the yard lane. Drivers often move based on schedule pressure, so the sign must be impossible to miss.
Mark drop zones for falling freight and swing zones for dock doors with floor pictograms, then repeat them on the wall at eye level. A forklift warning sign at the dock plate area also helps, because operators tend to accelerate when they see daylight.
Use “keep clear” pictograms around leveler controls and dock door buttons, because those areas attract staging clutter. When pallets block controls, people take awkward positions and make rushed moves, and that is when hands get pinched.
Include a “no pedestrians” or “authorized personnel only” icon for active dock doors if your operation allows visitors on the floor. The dock looks like a hallway to someone unfamiliar, so the pictogram must clearly say it is not.
Finally, review dock signage after any change in carrier mix or trailer types, because the hazards shift with equipment. A yard that moves from mostly dry vans to flatbeds and containers needs different pictograms and different placement.
Aisle entry and intersection pictograms: where most decisions happen
Aisle entries are where people decide to step in, speed up, or cut through, so treat them like controlled intersections. Use the same icon set at every entry so a worker does not have to interpret a new layout each time.
Consistency matters more than creativity, because the brain reads familiar symbols faster under stress. If one aisle uses a forklift warning sign and the next uses a text only sign, you have created a training problem that never ends.
Place signs where the eyes naturally go, which is usually toward the rack end and the open aisle, not toward a random wall. A sign that is technically “near” the intersection but outside the sight line will not change behavior.
Place a forklift warning sign high enough to clear stacked pallets but low enough to stay in the normal sight line, often around 60 to 72 inches to the center where posts allow it. If you rely only on overhead signs, tall loads and rack signage clutter will block them at the worst moment.
Use double sided signs or place duplicates when aisles have two way traffic. A single sign facing one direction is a common miss, and it creates a false sense that the intersection is “covered.”
Do not forget the approach from secondary paths, like pick tunnels, man doors, and break room exits. People often enter aisles from these side points without the same situational awareness as someone walking the main corridor.
For blind corners, add mirror symbols and “sound horn” pictograms, but do not stop there. Paint a stop bar or yield triangle on the floor and match it with a wall sign so the rule stays obvious when the floor gets resurfaced.
Mirrors help, but they are not magic, especially when they get dusty or misaligned. Treat mirror pictograms as a reminder to slow down, not as permission to maintain speed.
Use “stop” versus “yield” intentionally, because they create different expectations and different conflicts. If every intersection is a stop, people will roll through, but if only the high risk ones are stops, the rule stays meaningful.
Separate pedestrian cut throughs from equipment lanes with both markings and icons, because tape alone looks like decoration after a while. If the route must cross, use a pedestrian crossing pictogram plus a right of way sign so the priority is not negotiated in real time.
When you use floor pictograms, assume they will be covered by pallets, slip sheets, and debris, and plan a second layer at eye level. The best systems repeat the same message in two planes so one is always visible.
If you have one way aisles, reinforce them with directional arrows and “no entry” pictograms at the wrong end. One wrong way forklift move can create a chain of near misses, so the entry needs a clear visual “do not.”
Consider adding a “look both ways” style pictogram at high pedestrian crossings, because people get tunnel vision when they are picking. A simple reminder at the crossing edge can interrupt that autopilot moment.
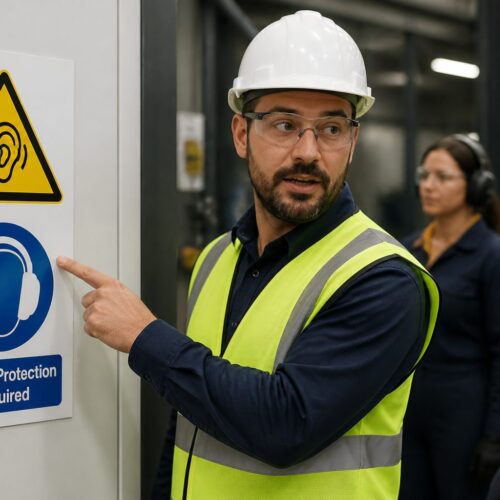
PPE and behavior pictograms: making rules easy to follow
PPE pictograms work best when they match the actual hazards in that zone, not a blanket list that nobody reads. If only the battery room needs face protection, post that icon at the battery room door and do not dilute it across the whole building.
Zone based PPE also reduces arguments, because people can see exactly where the rule starts and ends. When PPE rules feel random, compliance becomes a personal debate instead of a standard.
Keep PPE icons close to the point where people can actually put the gear on, like near PPE stations and entrances. If the sign is deep inside the area, you will see people stepping in “just for a second” without protection.
Behavior icons should target the habits that cause your incidents, like phone use in aisles or walking under raised forks. I prefer a small set of hard rules, posted repeatedly, over a giant board of twenty tiny symbols that people tune out.
Make behavior pictograms specific and observable, because vague rules are hard to enforce consistently. “Be alert” is not enforceable, but “no pedestrians under raised load” is clear and actionable.
Place behavior icons where the behavior happens, not where people take breaks. A “no phone” pictogram at the aisle entry does more than a poster in the break room that everyone ignores on the way back to the floor.
If you have exceptions, define them in training, not on the sign, because signs become cluttered when they try to cover every scenario. The pictogram should communicate the default rule, and supervisors can handle the rare edge case.
- Safety shoes required pictogram at all production entries
- High visibility vest required icon at yard and dock doors
- Eye protection required symbol at battery charging and cutting stations
- No pedestrians under raised load icon at lift zones
- No mobile phone use symbol in active forklift aisles
- Authorized personnel only restricted area sign at maintenance rooms
Use the list as a baseline, then verify that each icon matches a real control, like available PPE and clear boundaries. If you require high visibility vests at a door, there should be vests stocked right there, not across the building.
Refresh PPE pictograms when you change processes, because new equipment can introduce new exposures. A new banding station, for example, might require eye protection and cut resistant gloves where none were needed before.
Also check that PPE icons match what people actually wear, because mismatched visuals create doubt. If the pictogram shows a hard hat but your site requires bump caps, people will question whether the sign is current.
When behavior problems persist, treat pictograms as one layer, not the whole fix. If people keep walking in forklift lanes, you may need barriers, route redesign, and staffing changes in addition to signs.
Restricted areas and access control pictograms that people respect
Restricted areas fail when the sign says “keep out” but the door stands open all day. If you need compliance, pair a restricted area sign with hardware like self closing doors, badge readers, or a simple latch that makes entry a conscious act.
Make the restricted boundary obvious from a distance, because people decide to cut through before they reach the door. A clear icon at the approach, plus a second sign at the portal, reduces “I didn’t realize” excuses.
Use physical cues that match the pictogram, like yellow and black striping, bollards, or mesh panels. When the environment looks controlled, the restricted area sign feels like a rule, not a suggestion.
Use clear authorization language in your internal training, but keep the sign itself icon led and simple. A hand stop symbol, an “authorized personnel” pictogram, and a PPE pictogram at the same portal often works better than a paragraph of policy text.
Keep the icon order consistent, because people scan left to right and top to bottom. If every restricted portal shows stop, then authorization, then PPE, the meaning becomes automatic.
Do not overload restricted portals with unrelated signs, because too many messages cancel each other out. If the door is covered in random notices, the restricted area sign becomes just another rectangle.
Mark robot cells, conveyor pinch points, and compactor zones as restricted even if employees “only step in for a second.” People take shortcuts when they are rushed, so your pictograms for warehouse safety should assume someone will try the fastest path.
For automation, include a clear “automatic start” or “moving equipment” pictogram where appropriate, because the risk is not always visible. A quiet conveyor can look dead until it starts, and that surprise is exactly what you are trying to prevent.
For maintenance areas, add lockout related pictograms near energy isolation points, even if full procedures are elsewhere. The sign is not the procedure, but it can prompt the right pause before someone reaches in.
Do not hide restricted signage behind pallets, shrink wrap, or parked equipment, because that signals the area is optional. If storage creeps into the boundary, treat it as a housekeeping issue and fix it the same day.
Audit restricted areas during peak season, because that is when boundaries get tested. Temporary labor, overflow storage, and rushed maintenance create the perfect conditions for people to ignore access control.
When a restricted area is frequently accessed by authorized staff, make the entry process fast but deliberate. A badge reader with a clear pictogram can be better than a padlock that gets left open to save time.
How to maintain sign visibility over time (damage, dust, lighting)
Most warehouse signs fail from grime, impacts, and lighting changes, not from bad design. If your forklifts scrape posts weekly, mount signs on protected surfaces or use rigid panels with corner guards instead of thin adhesive labels.
Choose materials based on the abuse level of the zone, because not every area needs the same build. A battery room sign may need chemical resistance, while a dock sign may need impact resistance and easy wipe surfaces.
Protect signs from pallet strikes by placing them on the “quiet side” of posts or behind guard rails when possible. If you must mount on a high impact post, consider a sacrificial panel that can be replaced quickly.
Dust and diesel film can turn a bright icon into a gray smudge, so build cleaning into the same schedule as floor sweeping. A quick wipe during weekly 5S walks keeps PPE pictograms readable and prevents the slow slide into visual clutter.
Assign ownership for cleaning, because “everyone” usually means no one. When a specific role owns sign condition checks, the system stays alive after the initial rollout.
Do not forget high signs, because they collect dust and are easy to ignore until they are unreadable. A simple quarterly ladder check can restore visibility in areas with heavy air movement and cardboard dust.
Lighting matters more than people admit, especially in older buildings with spotty LEDs and skylight glare. Use reflective materials for key warnings, and check that a forklift warning sign is still legible when viewed from a seated position at night shift.
Test signs under real conditions, like with a loaded forklift approaching at normal speed, because that is the true viewing scenario. A sign that looks clear during a slow walk through may fail when seen through a mast and a shrink wrapped pallet.
Consider contrast with the background, because a yellow sign on a yellow post is functionally invisible. If your facility uses color coding, make sure the pictogram still stands out from the zone color.
Track sign condition like any other asset, with a simple map and replacement triggers. If a restricted area sign has torn corners or fading, replace it immediately, because a damaged sign teaches everyone that rules are negotiable.
Use a quick inspection checklist that includes readability, placement, and obstruction, not just whether the sign exists. A sign behind a stack of empty pallets is technically present, but operationally useless.
When you replace a sign, ask why it failed, because repeated replacements in the same spot point to a layout problem. Sometimes the right fix is moving the sign two feet, adding a bollard, or changing traffic flow, not buying thicker plastic.
Finally, control sign sprawl, because too many signs create the same effect as no signs. If every surface is covered, people stop seeing any of it, so retire outdated or redundant pictograms as part of maintenance.
Conclusion
A practical sign setup is consistent, repetitive in the right places, and tied to how people actually move through aisles, docks, and racks. When you treat pictograms for warehouse safety as part of operations, they stay useful long after the rollout meeting.
Good pictograms reduce the mental load on busy shifts, because people do not have to translate instructions while dodging traffic. They also help supervisors coach fairly, because the expectation is posted clearly in the same place every day.
Pick a small, clear icon set, place it at decision points, and back it up with enforcement and layout changes that match the message. Keep your forklift warning sign, PPE pictograms, and restricted area sign clean and visible, and you will see fewer close calls and fewer arguments about what the rules were.
If you want a simple next step, pick one high incident area and rebuild its pictogram system end to end, then copy what works to the rest of the building. The fastest improvements usually come from tightening consistency and placement, not from adding more words.