Most safety symbols fail for boring reasons, they are posted where nobody naturally looks. Pictogram placement guidelines start by accepting that people scan spaces in motion, and their eyes follow tasks, not walls.
A forklift driver entering a bay does not search for a sign, they track pedestrians, pallet edges, and turning radius. If your pictogram is outside that line of sight, it may as well be in a drawer.
Placement is also where design meets accountability, because a clear symbol in the wrong spot still leads to incidents. The goal is simple, put the right pictogram where it gets seen early enough to change behavior.
This article focuses on real spaces like corridors, doors, loading docks, and equipment zones. You will see practical rules for sign visibility distance, mounting height, and when repeating symbols helps or hurts.
Start with the user’s path: viewing angles and approach speed
Start by mapping how people actually approach the message location, not how you wish they would approach it. A nurse pushing a gurney, a visitor looking for an exit, and a warehouse picker all bring different viewing angles and different attention limits.
Approach speed changes everything because it sets the time window for reading and reacting. If the viewer is walking at 3 mph you can place a sign closer to the decision point, but a pallet jack or vehicle needs earlier notice.
Line of sight is rarely straight in buildings, because door frames, open lockers, and people form moving obstructions. When you evaluate a location, stand where the user first needs the information and check whether anything blocks the symbol at that moment.
I prefer to treat corners as decision points, because that is where most wrong turns and near misses happen. Put the pictogram where it can be seen before the corner, not after the person has already committed.
For vehicles, think in stopping distance and turning arcs rather than hallway geometry. A forklift rounding a blind intersection needs warning at the last straight segment where the driver still has time to slow down and yield.
Finally, consider head and body orientation because people often walk forward while looking sideways at room numbers or rack labels. If the sign faces the corridor but the user is angled toward a doorway, rotate or duplicate the message to match that approach.
Recommended placement zones for doors, corridors, and equipment
Doors are high value because they force a decision, enter, exit, or keep out. Place the primary pictogram on the latch side at eye level so it stays visible when the door is open and people naturally look for the handle.
For double doors, avoid hiding the symbol on the inactive leaf where traffic rarely touches. If you must post on both leaves, keep spacing and height consistent so the message reads as one system, not two competing signs.
Corridors work best with repeated wayfinding and hazard cues, but only at points where a choice exists. Put directional pictograms at intersections, elevator lobbies, and stair approaches, not in long stretches where they become wallpaper.
In industrial aisles, mount pedestrian and vehicle separation pictograms where the separation starts, not where it is already obvious. A floor marking plus a wall mounted symbol at the aisle entry beats a single sign halfway down the run.
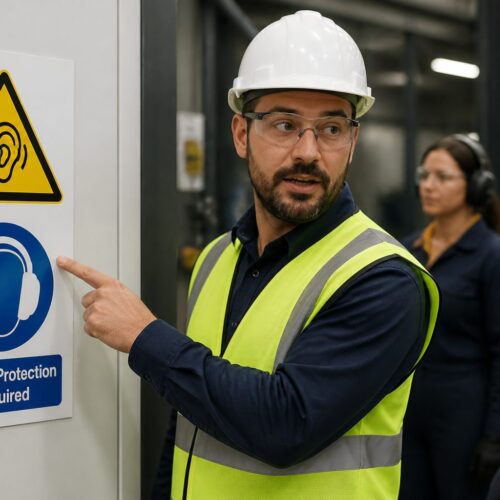
Equipment zones need signs placed where the operator checks controls, not where a passerby might glance. A lockout pictogram belongs near the energy isolation point, while a pinch point pictogram belongs at the guard edge where hands drift during setup.
For shared equipment like pallet wrappers or compactors, add a second pictogram at the approach path so users get warning before they step into the working envelope. This is one of the few times I like a redundant message, because it supports both approach and operation.
Height, size, and spacing: making symbols readable fast
Pictogram placement guidelines often get reduced to mounting height, but height only matters because it affects readability at speed. You want the symbol centered within the viewer’s natural line of sight, while keeping it clear of carts, open doors, and stacked materials.
Size should follow sign visibility distance, because a tiny pictogram that looks fine at arm’s length fails in a corridor. If the user needs to read it from 25 feet away, design and place it so it resolves as a clean shape at 25 feet, not as a fuzzy square.
| Use case | Typical sign visibility distance | Practical placement and sizing note |
|---|---|---|
| Door identification and access control | 3 to 10 ft | Mount near latch side, keep symbol large enough to read while reaching for the handle |
| Corridor direction change or intersection | 15 to 40 ft | Place before the decision point, increase pictogram size if the corridor is wide |
| Vehicle and pedestrian conflict point | 30 to 80 ft | Post at the last straight approach, avoid mounting where racking blocks the view |
| Equipment hazard at point of operation | 1 to 6 ft | Mount adjacent to control or access point, keep clear of hoses, guards, and labels |
Lighting, glare, and background clutter: what to fix first
Before you move a sign, look at light because glare can erase contrast faster than any bad color choice. A glossy laminated placard under a downlight often turns into a white rectangle as the viewer approaches.
Fix the light problem first when you can, because it improves every sign in the area. Swap to a matte finish, change the angle, or relocate the pictogram a few feet to avoid the hot spot and you usually get an immediate win.
Background clutter is the other silent killer, especially near bulletin boards, product posters, and equipment with dense labeling. If the wall already has twenty rectangles on it, your symbol becomes one more rectangle and the brain filters it out.
Give the pictogram breathing room by reserving a clear field around it, even if that means removing an old notice that nobody reads. I have seen a single cleanup pass, removing outdated memos and crooked tape, double the effective visibility of safety symbols.
Color contrast matters, but contrast alone does not solve a messy visual field. A high contrast sign placed among high contrast ads still loses, because the viewer cannot tell which message is the one that matters.
If you operate at night or in low light, treat illumination as part of the placement decision. A well placed pictogram that sits in shadow at 2 a.m. is a compliance artifact, not a safety control.
How to manage occlusion from people, doors, and stored materials
Occlusion is why signs that look perfect during installation fail during normal work. A door that swings open, a line of people waiting, or a stack of cartons can block the symbol right when it is needed.
For doors, avoid placing the only pictogram on the panel if the door commonly stays open. Put the main symbol on the adjacent wall on the latch side, then use a smaller repeat on the door if you need reinforcement.
For corridors, watch what happens during peak traffic because bodies become moving walls. If a sign is mounted low, people in front will hide it, so raise it or move it to a spot where the crowd naturally thins.
Storage creep is predictable in warehouses, because empty wall space invites pallets and carts. If a wall is likely to become a staging area, do not trust it as your only sign location, and consider overhead mounting where line of sight stays clear.
Equipment adds its own occlusion because guards, cables, and open access panels change the silhouette. Place hazard pictograms on fixed surfaces that remain visible in every normal operating configuration.
When you cannot avoid occlusion, use placement redundancy that matches the workflow. Two well chosen locations beat one sign that disappears half the day.
When you should repeat pictograms (and when it becomes noise)
Repeating pictograms works when the user has multiple chances to act, such as approaching a hazard and then operating the equipment. It also works when the environment forces short sightlines, like tall racking or sharp corridor turns.
Repetition becomes noise when you post the same symbol every few feet without a new decision point. People stop seeing it, and worse, they stop trusting that any one sign signals urgency.
- Repeat at each decision point, not between them
- Repeat when approach paths differ for different user groups
- Repeat when occlusion is common during normal operations
- Repeat at both approach and point of operation for equipment hazards
- Avoid repeating when the hazard is continuous and obvious
- Avoid repeating when multiple symbols compete on one surface
Mounting height rules that match adults, kids, and vehicle operators
Mounting height is a compromise between who needs the message and what blocks the view. In public buildings, eye level for standing adults is a solid baseline, but schools, clinics, and mixed use sites need a more deliberate choice.
If children are primary users, lower the symbol enough that it stays in their line of sight without forcing them to crane their necks. At the same time, keep it high enough that backpacks, coat racks, and hallway clutter do not cover it.
For vehicle operators, wall mounted signs often sit below the cab sightline, especially with seated posture and forward focused attention. Use overhead signs at aisle entries and intersections so the pictogram sits where the driver naturally scans.
On equipment, mount near the control interface because the operator already looks there during startup and shutdown. Do not bury a hazard pictogram behind a lever or on a surface that gets scraped, because wear turns clear graphics into gray ghosts.
Consistency matters because people build habits about where to look for information. If every door sign sits at a different height, users slow down to search, and that defeats the point of fast recognition.
When standards specify a range, pick a value and stick with it across the facility. The extra discipline pays off during audits and during emergencies when people revert to muscle memory.
Spacing and grouping: avoiding sign clusters that confuse people
Sign clusters happen because every department adds one more requirement to the same wall. The result is a collage where no single pictogram gets priority, and the user gives up.
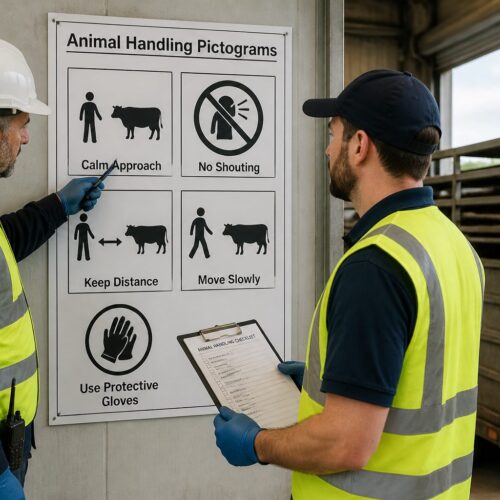
Group messages by task, not by who requested them, so the viewer can read them as one instruction set. For example, put PPE requirements together at the zone entry, then put equipment specific warnings at the machine, not all in the same entry cluster.
Spacing needs to support fast parsing, which means leaving clear separation between different message types. If two pictograms communicate different actions, give them enough space that the brain does not merge them into one muddled command.
Use a consistent layout grid so the eye knows where to go first, especially for multi symbol panels. I like a top to bottom order that matches the workflow, enter, required PPE, prohibited actions, then emergency information.
Do not mix temporary notices with permanent safety symbols on the same board. Temporary paper notices multiply and curl, and they destroy the perceived authority of the pictograms next to them.
If you cannot avoid a dense area, increase the white space and simplify the number of messages. A smaller set of clear pictograms beats a complete set that nobody reads.
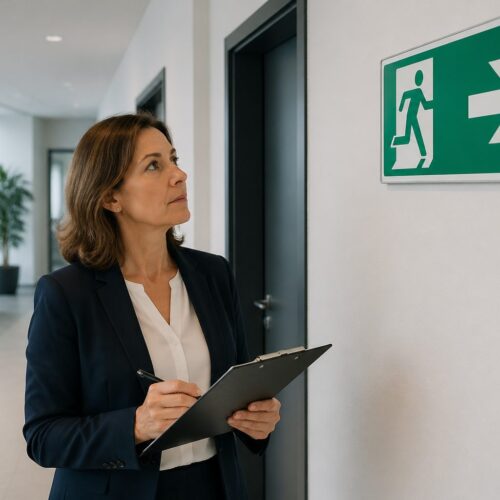
A walk-through method you can use to validate placement
Validation works best as a walk through with a clipboard and a little skepticism. Start outside the space, then approach each sign the way a first time user would, at normal speed and with normal distractions.
At each sign, mark the first point where you can correctly identify the pictogram and the first point where you can act on it. That gap is your usable sign visibility distance, and it often surprises people who only checked the sign while standing under it.
Next, test line of sight by repeating the approach while carrying something, pushing a cart, or walking with another person. If the pictogram disappears behind your own load or behind a companion, you have a placement problem even if the sign itself is perfect.
Then check lighting by walking the route at different times of day, because glare and shadow patterns shift. A sign that reads well at 10 a.m. can wash out at 3 p.m. when sun hits a polished floor and bounces upward.
Photograph each sign from the decision point using a normal phone camera, because the photo mimics what the eye catches in a quick glance. If the symbol is hard to spot in the photo without zooming, you should adjust size, contrast, or location.
Finally, ask one person who does not work in that area to walk the route and narrate what they notice. Their confusion is data, and it often points to the exact doorway, corner, or mounting height that needs a fix.
Conclusion
Good pictogram placement guidelines are less about perfect diagrams and more about respecting how people move and look. When you match placement to approach speed, line of sight, and real decision points, symbols start doing their job.
Use sign visibility distance to set size and lead time, then use mounting height and uncluttered backgrounds to protect readability. Repeat pictograms only when it supports the workflow, and treat every extra sign as a cost to attention.
If you want one practical habit, run regular walk through checks and take photos from the user’s viewpoint. The fixes are often simple, move the sign, raise it, kill the glare, and the space becomes safer without adding more words.