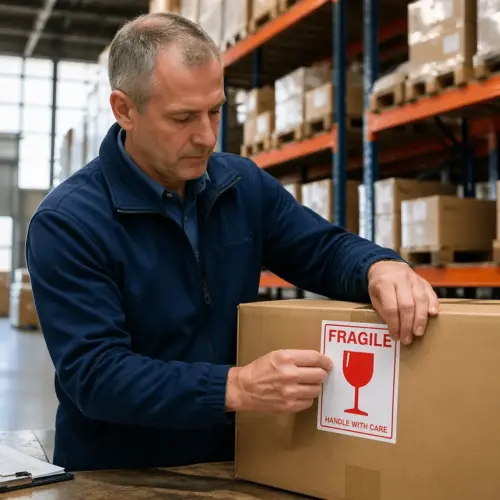
Cold chain shipments fail for boring reasons, like a smudged label, a missing temperature range label, or a handler who never realized the box needed cold storage. Cold chain label symbols fix that by turning storage and handling rules into quick, repeatable visual cues.
If you ship vaccines, insulin, cell cultures, seafood, or frozen dough, you already know the weak link is usually the handoff between people. Clear thermal handling marks reduce the amount of interpretation required when time is tight and lighting is bad.
I have seen teams spend heavily on packaging and data loggers, then lose product because the outer carton looked like any other carton. A consistent set of cold chain label symbols makes the shipper shout its requirements before anyone opens a door or signs a receipt.
Labels are not a substitute for good packaging, but they are the interface between your validated design and the real world. When the interface is ambiguous, every transfer becomes a gamble.
Most handlers are not trying to break your cold chain, they are trying to clear a dock and hit a schedule. Symbols are how you make the right action the easiest action.
It also helps that symbols scale across teams, sites, and countries with fewer translation errors. A single visual system reduces the “we do it differently here” problem that creeps in as you grow.
What cold chain symbols communicate in seconds
Cold chain label symbols communicate three things fast, the required temperature condition, the handling risk, and the storage priority. When a dock worker sees a keep refrigerated symbol, they should move the shipment toward a cooler without reading a paragraph of instructions.
A temperature range label does more than say “cold,” it tells people whether the target is 2°C to 8°C, 15°C to 25°C, or frozen. That difference drives where the box goes, which gel packs are used, and how long you can tolerate a delay.
Thermal handling marks also warn about exposure, like “protect from sunlight” or “do not freeze” for products that crash if they ice up. Those marks matter because a shipment can be inside a cold room and still get ruined by the wrong condition.
Good symbols work when the person touching the freight does not speak the shipper’s language. They also work when the person is tired, moving fast, and scanning a stack of cartons that all look the same.
In practice, symbols are also a triage system for crowded storage areas. If everything is labeled clearly, the most temperature sensitive freight gets handled first instead of last.
They communicate urgency without sounding dramatic, which matters on a busy dock where everyone thinks their shipment is important. A bold, familiar mark creates a shared priority that does not depend on personal relationships or special favors.
Symbols also reduce the need for verbal instructions that get lost during shift changes. When the next team walks in, the carton still carries the same message.
Another underrated function is exception handling, because symbols help people spot when something is wrong. If a keep refrigerated shipment is sitting in ambient staging, the label gives a clear reason to intervene.
They also support faster receiving, because a receiver can sort freight by condition before opening any paperwork. That speeds up putaway and reduces the time cartons spend warming up on the floor.
Even when you use electronic systems, the label is still the first thing a human sees. The best cold chain programs treat symbols as the visible layer of a deeper control strategy.
Choosing temperature range and storage condition marks
Start with the product stability data and lock the exact range you will print on the temperature range label. If your quality team says 2°C to 8°C, do not soften it to “cool” because that invites someone to park it in ambient staging.
Pick the keep refrigerated symbol when the product belongs in a refrigerator band and can tolerate brief excursions during transfer. Use frozen marks only when the product is specified for freezer storage, because “frozen” on the label changes how carriers prioritize and store it.
Do not mix competing messages like “keep refrigerated” and “do not freeze” unless you also print the range in numbers. People can follow both if you make it obvious that the target is above 0°C, but they will guess if you leave it vague.
Match your symbols to the packaging design, because some shippers rely on phase change materials that hold 15°C to 25°C, not refrigerator temps. If the carton says 15°C to 25°C and your label says refrigerated, your own label becomes the defect.
Controlled room temperature is a common place where teams get sloppy, because it sounds like “ambient” to non-specialists. If you ship 15°C to 25°C product, make that range loud and unmissable so it does not end up in a cooler “just to be safe.”
For products that are heat sensitive but not cold chain, a “protect from heat” message can be useful, but it should not replace numeric limits. Numbers are what let people make consistent decisions when conditions vary by season and geography.
If you use dry ice, your marks need to reflect both the storage condition and the hazard handling rules. A frozen symbol without the right dry ice labeling and documentation can create delays that are worse than a temperature excursion.
Think about what happens when a shipment is re-iced or reconditioned mid-route. If you expect that behavior, the label should support it with clear targets instead of leaving the depot to guess what “cold” means.
Standardize the vocabulary across your organization so “refrigerated” means the same thing in every building. When sites invent their own terms, you end up with labels that look consistent but drive different behaviors.
It also helps to align the printed range with how your monitoring devices are configured. If your logger alarms at 8°C but your label says 10°C, you will create confusion at receiving when people compare evidence.
Finally, decide what you want the handler to do when they cannot meet the condition. A clear label makes it easier for them to escalate early instead of hiding the problem until it becomes a loss.
Where to place labels on insulated shippers and pallets
Placement is where good cold chain label symbols either work or disappear into tape, straps, and forklift scars. You want symbols visible from more than one angle, because cartons often face a wall or get stacked tight on a pallet.
On insulated parcel shippers, put the temperature range label and keep refrigerated symbol on the top and at least one long side. On pallets, repeat the thermal handling marks on two adjacent sides, so a receiver can see them without walking a full circle.
A label that is technically present but hidden under a bill of lading pouch is not doing its job. Keep the main symbols in the “first glance” zone where hands naturally reach and eyes naturally land.
Think about how the unit will be moved, because a shipper that is always carried by side handles should not have critical information placed where fingers will cover it. If the handler has to rotate the box to read it, you have already lost time.
On pallets, avoid placing the only label on the side that will face the trailer wall. If you cannot control orientation, duplication is the only reliable solution.
Also plan for stretch wrap glare and wrinkles, which can make a crisp symbol unreadable under warehouse lighting. If you know wrap will be used, apply one label to the carton before wrapping and another on the outside after wrapping.
For insulated shippers with outer corrugate sleeves, make sure the label is on the outermost layer that will remain with the shipment. If the sleeve is removed at a cross dock, the inner container still needs the core temperature range label.
Do not put critical marks on seams that will be cut open, because the label will be destroyed during receiving. A receiver should be able to see the condition before they reach for a knife.
If you use corner boards, straps, or banding, reserve clear space so the symbol is not split into unreadable fragments. A half-covered icon is worse than none because it invites misinterpretation.
When you ship mixed loads, keep the cold chain labels visually distinct from general handling marks like “this side up.” If everything is bold, nothing stands out, and the temperature message gets lost.
| Packaging unit | Recommended label locations | Practical notes |
|---|---|---|
| Single insulated shipper (parcel) | Top panel, one long side | Keep clear of closure tape and carry handles |
| Overpacked cartons in a master case | Two opposite sides of master case | Repeat the temperature range label even if inner cartons are labeled |
| Standard pallet with stretch wrap | Two adjacent sides at eye level | Apply labels before wrapping, then add duplicates on the wrap |
| ULD or air container | Door side and one lateral side | Place thermal handling marks where ground crews scan paperwork |
Use the table as a baseline, then validate it against how your freight actually moves through your network. The best placement is the one that survives your real handling, not the one that looks tidy in a packaging SOP.
If you have recurring damage points, like forklift tine strikes or clamp trucks, move labels away from those impact zones. A symbol that gets scraped off every third shipment is a predictable failure, not bad luck.
For air shipments, remember that ULDs and containers often get relabeled by ground crews. Your carton-level symbols should still be visible when the outer container is opened at destination.
For last-mile delivery, plan for the box to be set on porches, reception desks, or mailrooms. A top label that is visible when the box is placed down can be the difference between immediate refrigeration and a two-hour wait.
Using time-temperature indicators alongside symbols
Cold chain label symbols tell people what to do, but they do not prove what happened during transit. Time-temperature indicators and electronic loggers add that missing piece by recording exposure or showing an irreversible change.
Use a simple indicator when the main risk is a short excursion, like a gel pack shipper that can drift warm on a hot dock. Use a calibrated data logger when you need a traceable record for release decisions, audits, or lane qualification.
Place the indicator where a receiver will actually look, usually near the main thermal handling marks on the outside or just inside the lid. If you hide it under paperwork, people skip it, and you lose the whole point of paying for it.
Train teams to treat the indicator result and the temperature range label as one decision package. A keep refrigerated symbol without an excursion check can lull people into complacency, especially when a shipment arrives late on a Friday.
Decide in advance what “good” and “bad” results mean, and write it down in plain language. If a receiver has to call three people to interpret an indicator, the shipment will sit in the wrong place while they wait.
Indicators also need their own handling rules, because some are light sensitive and some need a stabilization time before reading. If you do not teach that nuance, people will misread the device and make the wrong call with confidence.
Electronic loggers can create a false sense of security if nobody downloads them consistently. If you invest in loggers, invest in the process that turns their data into action.
When you use loggers, align the trip start and stop points with your handovers. A logger that starts recording hours before packing or stops recording before receiving will leave you arguing about the missing time.
Be careful about placing a sensor too close to a refrigerant brick, because it can read colder than the product space. If the sensor placement is biased, your data will be clean but misleading.
For high-value shipments, consider using both an external indicator for quick triage and an internal logger for detailed review. That combination lets receiving act fast while quality reviews the full trace later.
Most importantly, do not let monitoring become a substitute for clear symbols. Monitoring tells you a problem happened, but symbols are what reduce the odds of the problem happening in the first place.
Handover points: label checks at packing, pickup, and receiving
Most cold chain failures happen at handovers, not in the middle of a truck route, because that is where assumptions pile up. Build a habit of label checks at three moments, packing, pickup, and receiving.
At packing, confirm the temperature range label matches the packout plan, the refrigerant type, and the ship date. If you change from summer to winter configuration, update the printed marks instead of trusting tribal knowledge.
At pickup, the driver should see the keep refrigerated symbol and know whether the shipment goes into a refrigerated compartment or a cooler at the depot. If the carrier cannot support the condition, you want that argument before the freight leaves your building.
At receiving, the first check should happen before the pallet gets staged in ambient space. If the thermal handling marks call for refrigerated storage, the receiver should move it first and sign paperwork second.
At packing, add a quick “label present and legible” step to the final closeout, because printers jam and labels peel. It is cheaper to reprint a label than to investigate a temperature excursion caused by confusion.
Also verify that the label is on the correct outer unit, especially when teams build multiple shipments at once. A swapped temperature range label is a quiet error that can survive all the way to the customer.
At pickup, do not assume the driver understands your symbols just because they have seen them before. A new contractor or a substitute route can reset experience to zero.
Use pickup as a moment to confirm the shipment will not be left in an unrefrigerated cage “until the next run.” If that is how the lane works, you need a different service level or a different packaging design.
At receiving, teach teams to check the label before breaking down the pallet. If they depalletize into ambient space and only then notice the keep refrigerated symbol, they have already created an excursion.
Receiving is also where you can catch upstream errors like missing “do not freeze” marks on a product that cannot tolerate ice. When you catch it early, you can quarantine and escalate instead of silently storing it wrong.
Make the handover checks measurable, because what gets measured gets repeated. A simple tick box in a packing record or receiving log can create accountability without slowing operations.
When something goes wrong, use the labels as part of the investigation timeline. If the label was present and correct, you focus on behavior and environment, and if it was wrong, you fix the system that produced it.
Common cold chain labeling failures and fixes
The most common failure is vague labeling, like “keep cool” with no numbers, which makes every handler invent their own definition. Print a temperature range label with explicit limits and keep the wording consistent across lanes and sites.
The second failure is label conflict, like a keep refrigerated symbol on a shipper packed for controlled room temperature, or a “do not freeze” mark with no numeric range. Fix it by standardizing packout kits and linking label templates to specific SKUs or stability profiles.
A third failure is missing labels on overpacks, where inner cartons are marked but the master case is blank. Overpacks are what most handlers see, so the outermost layer needs the full set of thermal handling marks.
Another common problem is label drift over time, where old templates stay in circulation after a spec change. If you update storage requirements, you should retire old label files the same day instead of letting them linger on shared drives.
Smearing and condensation damage is also routine, especially on cold surfaces where moisture forms quickly. If your ink runs or your stock curls, you will end up with a label that looks like it was never printed.
Some teams place labels on removable lids or tear strips, then wonder why the message disappears at the first touch. If the label is likely to be removed during opening, it is not a reliable control.
There is also the “too many labels” failure, where every carton is covered in warnings and nothing stands out. If you overload the surface, handlers stop reading and treat it as noise.
Inconsistent symbol sets across business units can create confusion at shared depots. If one site uses one keep refrigerated symbol and another site uses a different one, the carrier will not learn either reliably.
Finally, do not ignore the failure where labels are correct but ignored because nobody owns the decision. If the SOP does not empower the receiver to move freight immediately, the best label in the world will still sit in ambient staging.
- Print numeric limits on every temperature range label
- Use weather resistant stock and strong adhesive for cold surfaces
- Apply duplicate thermal handling marks on two sides
- Keep symbols clear of tape seams and stretch wrap folds
- Include a receiving checklist that starts with label verification
- Retire old label templates when storage specs change
The list works best when you treat it like a minimum standard, not a one-time cleanup. If you build these points into work instructions and training, labeling quality stops depending on who is on shift.
It also helps to audit labels the way you audit temperatures, with routine spot checks and documented findings. When people know labels will be checked, they stop cutting corners on placement and legibility.
If you have recurring issues, do a quick root cause review instead of issuing another reminder email. Most labeling failures are system failures, like bad templates, poor printer settings, or unclear ownership.
Symbol clarity: size, contrast, and durability
A keep refrigerated symbol that is too small might as well be invisible on a busy dock. Use a size that reads at arm’s length on parcels and at several feet on pallets, because people often spot labels while moving.
Contrast matters more than design flair, so black on white or black on yellow beats pale colors on glossy stock. If your brand palette fights readability, choose readability and keep the brand on the paperwork instead.
Durability is a cold chain issue because condensation, frost, and abrasion destroy cheap labels quickly. Pick label materials that handle moisture and low temperatures, and test them on real shippers, not just on a clean desk sample.
Protect the printed face from scuffing by placing it on a flat panel, not on a corner that rubs against other cartons. If you must label stretch wrap, apply a second label under the wrap so at least one stays readable.
Font choice is part of clarity, especially for numeric ranges that people must read quickly. Use simple, high-legibility type and avoid squeezing the range into tiny text to make room for marketing copy.
Whitespace is also a tool, because crowded labels are harder to scan. A clean label with one main message and one numeric range beats a busy label with five competing icons.
In cold environments, adhesives behave differently, and some labels will lift at the corners after a few hours. If you apply labels to cold cartons, choose an adhesive rated for low-temperature application, not just low-temperature storage.
Consider abrasion from conveyor belts, tote bins, and pallet jacks, because those surfaces can sandpaper a label over a long route. A protective laminate can help, but only if it does not create glare that reduces readability.
Water resistance matters even for “dry” shipments, because rain and snow happen during loading and last-mile delivery. If your label turns to pulp after a short exposure, it is not fit for real distribution.
Durability also includes staying attached when cartons flex, which is common on insulated shippers with soft outer surfaces. If the substrate is textured or coated, test adhesion and switch stock rather than adding more tape.
Finally, remember that clarity includes consistency, because people learn patterns. If the same temperature range label looks different every week, handlers cannot build fast recognition.
Aligning symbols with SOPs, lane maps, and carrier rules
Cold chain label symbols fail when they are disconnected from how people actually move freight. Your SOP should spell out what each temperature range label means in practice, including where the shipment waits during staging and who owns the timer.
Lane maps help because they show where temperature control exists and where it does not, like cross docks, airline cool rooms, or last mile vans. If a lane has an ambient gap, your thermal handling marks should push teams toward mitigation, like pre alerting the receiver or using a higher performance shipper.
Carriers also have their own acceptance rules, and some will reject dry ice or require special documentation. Put carrier constraints into your label selection process, so you do not mark a shipment “frozen” and then hand it to a service that only supports cool storage.
When you audit, do not just check that a label exists, check that the label drove the right behavior at each handoff. If the box sat on an ambient dock under a keep refrigerated symbol, the problem is training and process, not ink.
SOP alignment also means defining what to do when labels are missing or damaged. If the instruction is “ask your supervisor,” make sure supervisors are available and empowered to make a decision fast.
Lane maps should include seasonal realities, because a lane that is safe in winter can be risky in summer. If you change packaging seasonally, your labels and handling instructions should change with the same discipline.
Carrier rules can affect label placement, because some carriers want certain marks near the address label or documentation pouch. If you fight their workflows, your labels may get covered or removed during relabeling.
Pre-alerts and booking notes should mirror the symbols on the carton. If the paperwork says “ambient” but the box says “keep refrigerated,” you force the carrier to choose which instruction to trust.
Align your internal training with the external symbols so people can explain them to partners. If your own team cannot describe the difference between 2°C to 8°C and 15°C to 25°C handling, the network will not handle it correctly either.
It helps to keep a single controlled library of approved symbols and templates. When anyone can design a label, you end up with lookalike icons that mean different things.
When you add a new carrier or a new lane, treat labeling as part of the onboarding checklist. A lane qualification that ignores label behavior is incomplete, because the best packaging still depends on correct handling.
Over time, use deviation data to refine your approach, because labeling is not static. If a particular handover keeps failing, adjust placement, duplication, training, or service design until the label consistently triggers the right action.
Conclusion
Cold chain label symbols work when they are specific, readable, and repeated where handlers naturally look. A clear temperature range label, a correct keep refrigerated symbol, and consistent thermal handling marks reduce the odds that someone improvises with your product.
Pair symbols with simple checks at packing, pickup, and receiving, then backstop the whole system with indicators or loggers when the risk justifies it. If you treat labeling as part of the cold chain design, not an afterthought, you will stop losing shipments to preventable confusion.
The goal is not perfect artwork, it is predictable behavior under pressure. When symbols, SOPs, and monitoring all point in the same direction, cold chain handling becomes routine instead of heroic.
If you want a practical next step, pick one lane and standardize the temperature range label, placement, and handover checks end to end. Once that lane stops generating labeling-related deviations, scale the same pattern across the rest of your network.