Cleaning pictograms are the small graphics that tell people how to wash hands, disinfect a table, or handle trash without relying on long text. When you manage a workplace, a warehouse, a school, or a public venue, those icons can prevent the kind of misunderstandings that turn minor messes into safety incidents.
I have seen well written cleaning instructions fail because the reader did not speak the language used on the poster. Hygiene symbols cut through that problem fast, and they stay readable when the environment is loud, rushed, or stressful.
Sanitation pictograms also help with consistency, because they push everyone toward the same steps and the same order. If your site already uses safety and logistics symbology, adding disinfection signs in the same style makes the whole system easier to follow.
Another advantage is that pictograms create a shared visual reference that new hires can learn in minutes instead of days. When staff rotate between zones, the same icons help them switch tasks without guessing.
Even in small teams, the day to day reality is that people interpret written instructions differently and they remember different parts. A clear icon at the point of use keeps the expectation stable even when supervisors are not present.
Cleaning pictograms are also easier to update than full procedure documents, especially when you change products or adjust contact times. You can refresh a sign set while keeping your core training materials intact.
Why use cleaning pictograms?
Cleaning pictograms make hygiene expectations visible at the exact point where the action should happen, like the sink, the mop closet, or the waste station. That placement matters, because people forget training details when they are busy and they default to habits.
Text only instructions can be precise, but they are slow to scan and they often get ignored. A simple icon of hands under water or a spray bottle on a countertop gives a quick cue that still works when the reader has limited literacy.

Standardized hygiene symbols also reduce arguments about what “clean” means in your facility. When the sign shows a sequence, like pre clean, apply disinfectant, and keep wet for a set time, you can audit the process instead of debating it.
From a compliance angle, sanitation pictograms support training records and inspections because they show you have communicated expectations clearly. Inspectors still want procedures and logs, but clear disinfection signs help prove you built the message into daily work.
Pictograms also reduce the mental load on workers who are juggling multiple priorities, especially in fast paced operations like fulfillment, hospitality, and healthcare support. When the next step is shown visually, people spend less time interpreting and more time doing the task correctly.
They help you standardize across vendors and contractors, which matters when cleaning is outsourced or partially outsourced. A contractor may bring their own habits, but a consistent set of hygiene symbols anchors them to your expectations.
Cleaning pictograms are useful for visitors and customers as well, not just employees. A clear “sanitize hands here” icon at an entryway can improve participation without requiring staff to remind everyone.
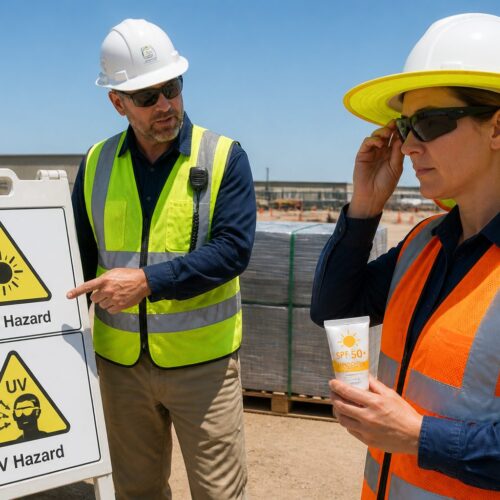
They also support incident prevention by making invisible risks feel real, like cross contamination between raw and ready to eat areas or chemical splash hazards at a dilution station. When the icon shows gloves, goggles, or ventilation, it prompts safer behavior without a long lecture.
In my experience, pictograms work best when they are part of a broader visual management approach that includes labels, floor markings, and storage outlines. The goal is not decoration, but a system where the correct action is the easiest action.
Finally, pictograms make coaching less confrontational because the standard is on the wall, not in someone’s opinion. A supervisor can point to the sign and ask for the steps to match it, which keeps the conversation focused on process.
Key cleaning pictograms and their meanings
Most cleaning pictograms fall into a few categories, like wash, disinfect, rinse, sanitize, and dispose, and the same icon can show up with small variations across different standards. The safest approach is to pair the icon with a short label and keep the graphic style consistent across your site.
Watch for pictograms that communicate time, concentration, and contact, because those details separate “looks clean” from “is disinfected.” A clock symbol, a percentage mark, or droplets on a surface can signal that the chemical needs a wet dwell time or a specific dilution.
Some hygiene symbols focus on personal protection, like gloves, goggles, or masks, and those belong alongside cleaning instructions when chemicals are involved. If workers see a spray icon without the glove icon, many will assume the task is low risk and skip protection.
Other sanitation pictograms focus on restricted areas, like “do not enter during cleaning” or “wet floor,” and those protect bystanders as much as staff. If you run a logistics operation, these signs reduce slips and also prevent forklifts or carts from rolling through freshly treated zones.
It helps to think of pictograms as a small vocabulary where each symbol has a consistent meaning and a consistent trigger. If you use one icon to mean both “sanitize” and “disinfect,” workers will mix up products and expectations.
Common “process” icons include a bucket, a mop, a spray bottle, a wipe cloth, and a squeegee, and each one suggests a different method. When the method matters, the pictogram should match the tool you actually provide.
Directional arrows are underrated, because they can show wipe direction, rinse direction, or a one way flow through a cleaning area. In high hygiene environments, arrows can also reinforce clean to dirty movement to reduce cross contamination.
Temperature symbols can matter in kitchens and labs, where hot water, steam, or heat sanitation is part of the process. If temperature is critical, a thermometer icon with a number prevents the “warm enough” guesswork.
Look for pictograms that communicate “do not mix” or “do not combine,” especially if multiple chemicals are stored in the same closet. A simple crossed out beaker or crossed out bottles can prevent dangerous improvisation.
Another useful category is “storage and readiness,” like an icon that shows a bottle label, a closed cap, or a locked cabinet. Those symbols remind people that safe cleaning includes what happens before and after the wipe down.
If your facility uses color coded tools, you can reinforce that with pictograms that show the tool color or a small color band next to the icon. The icon still needs to work in grayscale, but the extra cue can reduce tool swapping.
When you choose a set, test it with the people who will actually use it, not just managers who already know the process. If two out of five workers interpret an icon differently, it is not ready for rollout.
Pictograms for hand hygiene
Hand hygiene pictograms work best when they show actions in a clear sequence, because people tend to rush and skip steps. The most common set includes wet hands, apply soap, scrub, rinse, dry, and use a towel to turn off the faucet.
If you only post a single “wash hands” icon, you will get wildly different results depending on the person. A sequence of hygiene symbols sets a baseline and makes it easier for supervisors to coach without sounding personal.
Time is the biggest missing detail in handwashing, so I like pictograms that include a small clock or a number like 20 seconds. Without that cue, many people do a quick rinse and assume it counts.
A good scrub icon should imply friction across fingers, thumbs, and nails, not just palms. If your sign set allows it, include a second scrub pictogram that highlights fingertips and nail beds.
Hand sanitizer pictograms should be separate from handwashing pictograms, because the situations are different and the steps are different. A sanitizer icon should show a pump and rubbing hands until dry, not a towel or running water.
In food service and healthcare adjacent settings, add a pictogram that signals when handwashing is required, like after restroom use, before food handling, or after handling trash. People remember the steps better when the sign also reminds them of the triggers.
If gloves are used, a hand hygiene sign should clarify that gloves do not replace washing and that hands should be cleaned before and after glove use. A glove icon next to a wash icon can prevent the common mistake of wearing the same gloves from task to task.
Accessibility matters, so consider pictograms that show turning on touchless taps or using an elbow lever where available. When the icon matches the fixture, people are less likely to touch surfaces they do not need to touch.
In schools and public venues, hand hygiene pictograms can reduce congestion by guiding people to multiple sinks or stations. A simple arrow plus a handwash icon can improve flow during peak times.
For restrooms, I also like a small icon that reminds people to avoid leaving with wet hands, because wet hands spread microbes more easily than dry hands. A dry hands pictogram placed at the exit reinforces that last step.
| Pictogram | Common meaning | Placement tip |
|---|---|---|
| Hands under running water | Wet hands before soap | Above the faucet or mirror |
| Soap dispenser with droplet | Apply soap | On the dispenser or tile behind it |
| Hands with scrub lines | Scrub all surfaces for set time | Eye level near the sink |
| Hands under water with arrows | Rinse thoroughly | Near the rinse area |
| Hand with towel or air dryer | Dry hands completely | At paper towel and dryer stations |
If you have recurring supply issues, add a small pictogram that signals “report empty soap” or “refill needed” near the dispenser. It is a simple way to turn users into early warning sensors without adding a long complaint process.
For facilities with high allergen sensitivity, consider a pictogram that indicates fragrance free soap or approved product only. That small detail can prevent well meaning substitutions that trigger reactions.
Hand hygiene signage should also be kept clean, because a grimy poster above a sink sends the wrong message. If the sign is part of the cleaning route, it stays credible and people keep noticing it.
Pictograms for surface disinfection
Surface disinfection signs need to do more than say “spray and wipe,” because that shortcut can fail with many products. Good cleaning pictograms show a wipe step for soil removal, then a disinfectant application step, then a waiting step for contact time.
In food areas, you often need separate sanitation pictograms for clean, rinse, and sanitize, because sanitizer is not the same as a heavy duty disinfectant. Mixing those messages can lead to residue, corrosion, or a false sense of control.
For shared tools like scanners, pallet jacks, and touch screens, the icon should suggest a gentle wipe and the right chemical, because harsh products can damage coatings. I prefer disinfection signs that include a “no spray directly” symbol for electronics, since overspray is a common mistake.
Contact time is the detail most people ignore, so use a clock icon paired with a number, like 1 minute or 10 minutes, based on your approved product label. If you cannot print the time, at least use a clock pictogram so staff know waiting is part of the job.
Surface disinfection pictograms should also clarify whether the surface must stay visibly wet or just treated, because those are not the same thing. A droplet icon on a surface, paired with a clock, is a simple way to communicate “keep wet.”
When dilution is required, include a measuring cup icon or a ratio icon, because “a little bit” varies from person to person. If you use an automated dilution station, a pictogram that shows the correct button reduces costly mistakes.
In high touch areas like door handles, railings, and break room tables, consider a pictogram that highlights the specific touch points. A generic countertop icon is easy to ignore, but a handle icon feels more targeted and relevant.
If you use disposable wipes, the pictogram should show one wipe per area or “use fresh wipe” when needed. People often stretch a wipe too far and end up smearing soil instead of removing it.
For spray products, add a ventilation or airflow icon where fumes are a concern, especially in small rooms. A simple window or fan symbol can remind workers to open vents before they start.
Some surfaces require a final rinse, especially when food contact or sensitive skin contact is possible, so make that step visible with a rinse icon. When the sign does not show a rinse, many workers assume it is never needed.
It is also useful to show “do not mix products” at the point where multiple bottles are stored, because people will combine leftovers to save time. A crossed out mixing icon can prevent both chemical hazards and performance failures.
For shared vehicles and equipment, a pictogram set can include “clean at start of shift” and “clean at end of shift” icons so responsibility is clear. When the timing is vague, everyone assumes someone else will do it.
If you run a facility with both routine cleaning and outbreak response, consider a pictogram that signals “enhanced disinfection” with a clear visual difference. That way, staff know when to switch products or increase frequency without reading a long memo.
Pictograms for waste disposal
Waste disposal hygiene symbols prevent cross contamination by keeping trash streams separate, especially when you handle food waste, packaging, and chemical containers in the same building. Clear sanitation pictograms also reduce injuries, because people stop stuffing sharps, broken glass, or contaminated wipes into the wrong bin.
Use distinct icons for general waste, recycling, compost, and regulated waste, and do not rely on color alone because lighting and printing vary. If you use disinfection signs for used wipes or PPE, make sure the icon signals “contaminated” so workers do not treat it like normal trash.
For chemical waste, include a container icon plus a warning symbol that fits your internal safety program, and keep the message short. People need to know whether the container is rinsed, capped, or stored in secondary containment, and a good pictogram can show that in one glance.
In restrooms and break rooms, waste disposal cleaning pictograms should cover paper towels, feminine hygiene products, and diaper disposal when relevant. Those are awkward topics, but clear hygiene symbols reduce clogs and keep custodial staff from dealing with preventable messes.
Waste pictograms should also show what not to put in a bin, because contamination is usually caused by a few common wrong items. A small crossed out battery, aerosol can, or food icon can protect your recycling stream without needing a long list.
If you handle broken glass, include a dedicated broken glass container icon and place it right where breakage is likely, like near vending areas or lab benches. When the container is far away, people default to the nearest trash can.
For sharps, the pictogram should be unmistakable and paired with a “do not overfill” cue. A fill line icon can reduce the risk of needle sticks during disposal and pickup.
In production environments, a “clean as you go” waste icon can be helpful, especially near workstations that generate small scraps. It sets the expectation that waste control is part of the job, not an extra task for later.
If you use liners, a pictogram that shows tying off the bag before removal can prevent leaks. A simple knot icon or cinch icon is enough to signal the step.
For regulated waste, consider adding a transport icon that shows the correct route or cart, because the disposal process often fails after the bin is full. When the sign shows where it goes next, you reduce the chance of it being left in a hallway or general storage area.
Waste disposal pictograms can also support odor and pest control by reminding people to close lids. A lid closed icon seems basic, but it prevents the open bin habit that attracts insects and creates complaints.
Finally, place disposal icons where decisions happen, not just on the main bin station, because people throw things away at the nearest opening. Small decals on satellite bins can keep sorting consistent across the whole building.
Where to display cleaning pictograms effectively
Placement beats design if you have to choose, because the best icon fails when it is hidden behind a door or posted ten feet from the task. Put cleaning pictograms at the point of use, like inside the janitor closet, above the dilution station, and next to the waste bins.
Height and sight lines matter in busy facilities, so mount signs where people naturally look while working, not where a wall happens to be empty. In warehouses, I like sanitation pictograms on the front of cleaning carts and on the ends of aisles near high touch zones.
Use durable materials, because disinfection signs printed on thin paper curl, tear, and get stained fast, which makes them look optional. Laminated sheets work for offices, but in wet areas you may need rigid plastic, adhesive vinyl, or protected frames.
If you run multilingual teams, pair hygiene symbols with short text in the top one or two languages on site, and avoid cramped blocks of translation. The icon should carry the message, and the text should confirm details like product name, dilution ratio, or contact time.
Think about workflow when you place signs, because people move through tasks in a predictable order. If the sign is posted after the step, it becomes decoration instead of guidance.
Lighting is another practical issue, especially in back of house areas where bulbs are dim or fixtures are blocked. High contrast pictograms and reflective materials can keep signs readable without adding more text.
In areas that get sprayed down, avoid placing signs where they will be constantly soaked or hit by hoses. If a sign degrades quickly, staff learn to ignore it and you lose the benefit of the whole system.
Use repetition strategically by placing smaller versions of the same icon set at multiple decision points. For example, a hand hygiene pictogram can appear at the restroom sink and again at the entry to a production area.
For shared equipment, place a small disinfection icon directly on the equipment or on a tag attached to it. A sign on the wall is easy to miss, but a label on the handle is hard to ignore.
Make sure pictograms are not blocked by open doors, stacked supplies, or seasonal displays. A quick monthly walk through with fresh eyes can catch these slow changes before they become normal.
Consistency in location helps too, because people learn where to look for instructions. If every cleaning station has the same sign in the same spot, new staff will find it without asking.
Do not overload a single board with too many icons, because clutter makes scanning harder. It is better to split a large procedure into two or three small signs placed at the exact sub steps.
Finally, connect pictograms to supplies by storing the right tools directly under the sign. When the sign says “use gloves” and the gloves are missing, the message loses credibility fast.
Conclusion
Cleaning pictograms work because they turn hygiene rules into visible habits, and that is what keeps standards steady across shifts and departments. When you choose clear hygiene symbols and keep them consistent with your broader safety and logistics symbology, people make fewer mistakes.
Sanitation pictograms and disinfection signs do not replace training, but they make training stick when real work gets messy. If you audit your highest risk areas and post the right icons at the point of use, you will see better compliance and fewer avoidable incidents.
The real value is that pictograms reduce the gap between what you intend and what actually happens on the floor. When the message is visible, simple, and repeated, it becomes part of the routine instead of a reminder that only shows up during audits.
If you are building or refreshing a sign set, start small with the tasks that cause the most rework, complaints, or safety risk. Once people trust the icons and see that they match reality, expanding to other areas becomes much easier.
Keep reviewing your pictograms as products, layouts, and teams change, because a sign that was accurate last year can become misleading after a process update. A short quarterly check is usually enough to keep the system aligned.