Most wayfinding systems fail for a boring reason, the sign shows up after the person needed it. When people stop, scan, and choose a direction, that is the moment your wayfinding signage placement guidelines need to win.
I have watched visitors in hospitals walk right past beautiful sign panels because the panel sat behind a column or above a door they already committed to. They did not ignore the information, they never saw it at the time their brain was asking for it.
Good placement is less about graphic design and more about human behavior under pressure, like carrying boxes, pushing a cart, or trying to make an appointment on time. If you place signs where people actually decide, the building feels simpler even when it is not.
It also changes how staff behave, because they stop giving constant directions and start trusting the environment to do its job. When that happens, the facility runs smoother and the signage stops feeling like an afterthought.
The hard part is that placement is invisible when it works, so teams tend to focus on finishes, fonts, and brand colors. The moment you watch a first time visitor miss a turn, you realize placement is the real product.
The core principle: place signs at decision points
A decision point is any spot where a person must choose, like a T intersection, an elevator lobby, or a corridor that forks around a secure door. Decision point wayfinding works because it matches the moment people switch from walking mode to choosing mode.
When a sign appears ten steps after the turn, you have already lost the person who needed it. Put the instruction before the choice, with enough lead time that a walker and a wheelchair user can both react.
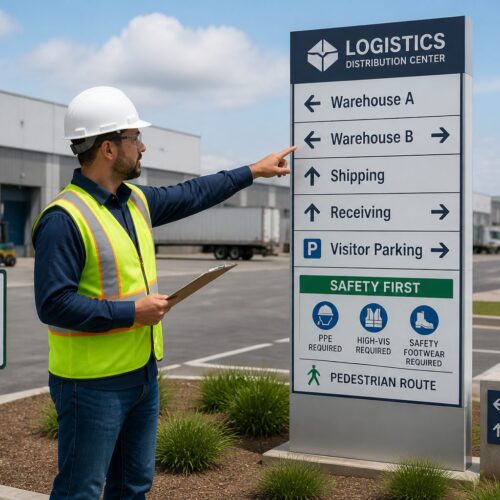
Think in terms of questions people ask out loud, like “Is this the right hall for Shipping?” or “Do I go left for Receiving?” Your sign should answer that exact question at the exact location where it comes up.
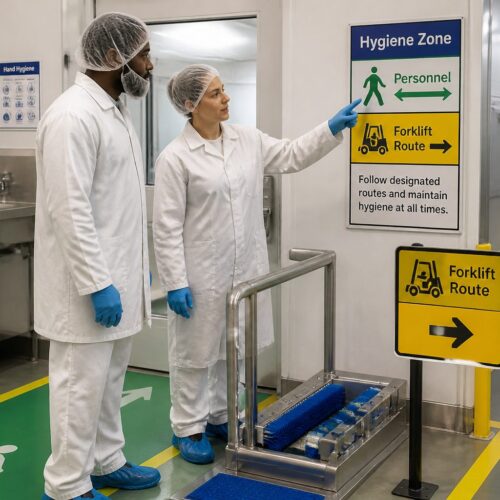
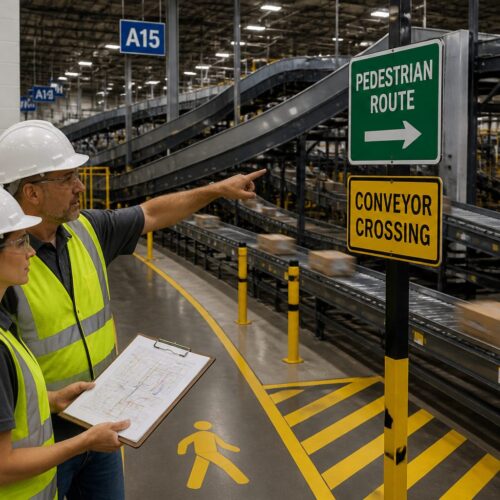
In warehouses and plants, decision points include places where pedestrians mix with forklifts and where routes split into marked aisles. If you treat those as wayfinding nodes, you can plan sign locations like a route map instead of a decoration plan.
Decision points are not only intersections, they include moments where the destination could be mistaken for something else, like two identical elevator banks or two similar stair doors. If the environment creates doubt, treat that spot as a decision point even if the corridor technically continues straight.
Entry points are decision points too, because the first thirty seconds sets confidence for the whole trip. If the first sign is missing or vague, people start improvising and then every later sign has to work harder.
Another common decision point is the point where a public route becomes staff only, because people hesitate and look for permission cues. A well placed sign can prevent accidental access into secure zones without adding a guard or a barrier.
In multi-tenant buildings, the decision point is often the moment someone chooses the right elevator group, not the right hallway. If you wait until they exit the elevator on the wrong floor, you have turned a simple choice into a full reset.
When you map decision points, include the return trip, because people leave with different priorities than they arrived with. Finding Parking or the Exit is often more urgent than finding a clinic, and the decision points shift when someone is tired or carrying paperwork.
It helps to treat each decision point like a mini contract, where the sign promises a route and the building must keep that promise. If the route changes later, you either add reassurance signs or you move the original message closer to the new reality.
Sightlines and obstructions in real work environments
Line of sight planning is where many projects get sloppy, because the drawing shows a clear corridor and the real building has pallet racks, fire doors, and temporary staging. A sign that is readable in an empty hallway can disappear once the first rolling cart parks under it.
Walk the route at the speed people actually move, not the speed you move during a site visit. If you cannot read the sign while walking and scanning ahead, the sign is functionally late.
Pay attention to visual noise, like vending machines, bulletin boards, and digital screens that pull attention away from static text. In a busy lobby, you may need fewer signs with cleaner placement, not more signs competing for the same glance.
Obstructions are not always physical, they can be lighting and glare from polished floors or a window wall. If the sign face washes out at 3 p.m. every day, your placement is wrong even if the mounting height looks correct.
Also watch for obstructions that change by season, like holiday trees, donation bins, or pop-up check-in tables. A placement that works nine months of the year can fail during the exact season when visitor volume spikes.
Door swings and open doors are a quiet sightline killer, especially in clinics and schools where doors are propped open for airflow. If a door leaf blocks a wall sign half the time, you either move the sign or you treat the door as a permanent obstruction.
In industrial settings, sightlines are affected by safety mirrors, warning beacons, and high-contrast hazard stripes that dominate attention. Your wayfinding signs must sit where they can be noticed without competing with critical safety information.
Ceiling grids and mechanical drops can force overhead signs into awkward positions that look fine on paper but land behind sprinklers or lights. If the sign ends up in a shadow pocket, people read it later than you intended.
Think about approach angles from multiple heights, because a child, a seated visitor, and a tall adult do not share the same sightline. A sign that is technically visible can still be missed if it sits above the natural scan zone for the main user group.
In corridors with glass walls, reflections can double the sign and make arrows feel ambiguous. If you notice people slowing down to confirm direction, you may need to shift the sign away from reflective surfaces rather than redesign the graphics.
Finally, treat temporary construction walls as a real part of the environment, because they can last for years. If a renovation phase blocks a key sign, add a temporary replacement at the new decision point instead of hoping people will adapt.
Height, angle, and distance: practical placement targets
Sign placement height depends on who needs the information and how fast they move, so a single number rarely fits an entire facility. Still, practical targets keep teams aligned, and they make reviews faster when you are applying wayfinding signage placement guidelines across many floors.
Angle matters as much as height, because a wall sign that sits flat to the corridor can vanish until you are beside it. If you need earlier notice, project the information into the approach with a perpendicular blade sign or an overhead sign placed before the turn.
Distance is where people get misled by aesthetics, because a sign can look perfectly centered on a wall while being too far from the decision it needs to support. If the sign is not readable until the user is already committed, it is decoration, not guidance.
In fast-moving corridors, like main hospital spines or airport-like connectors, you need longer lead time and fewer words. The more time pressure a person feels, the more they depend on early, simple cues.
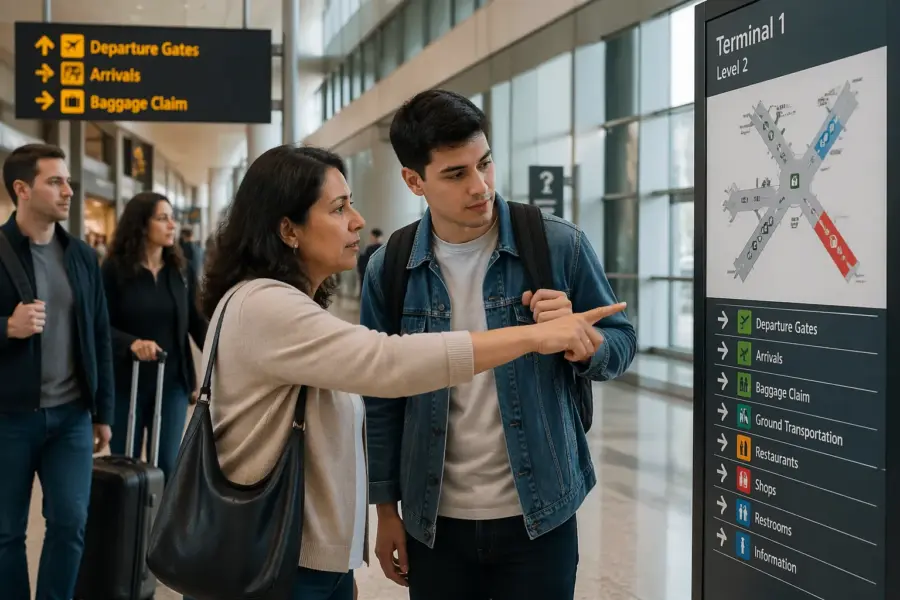
In slow zones, like waiting areas and elevator lobbies, you can place more detailed information because people naturally pause. That is where directories, maps, and multi-destination panels earn their keep.
Be careful with mounting signs too high just to clear equipment, because you can push them out of the normal scan range. If you must mount high, compensate with larger type and a placement that aligns with the approach angle.
Be careful with mounting signs too low in busy corridors, because people will block them with their bodies while they read. A sign that is always hidden behind a standing crowd is effectively not installed.
When you choose between a wall sign and an overhead sign, ask how soon the user needs the information. Overhead signs are often the right answer when you need early guidance, but wall signs can be more comfortable for confirmation and door-level decisions.
Angle also includes the tilt of overhead panels, because a flat panel can be hard to read from directly below. A slight tilt toward the approach can improve legibility without changing type size.
Do not forget that distance is not only linear, it is also about time to react. A person pushing a bed, pulling a cart, or walking with a child needs more time than a person walking alone.
| Placement factor | Practical target | Notes for busy facilities |
|---|---|---|
| Wall sign centerline height | 54 to 60 inches above finished floor | Works for close range reading and aligns with many accessibility practices |
| Overhead clearance | 80 inches minimum to bottom of sign | Increase where tall carts, booms, or pallet loads pass under |
| Advance notice distance | 15 to 30 feet before the decision | Use the longer end for fast corridors and first time visitors |
| Viewing angle to sign face | Within 30 degrees of approach | Rotate or relocate if people must twist their neck to read |
| Letter height for primary destinations | 1 inch per 25 feet of viewing distance | Reduce distance or add repeaters if you cannot increase type size |
These targets are not magic, but they give you a shared language when multiple stakeholders argue about “what looks right.” When you tie placement to viewing distance and decision points, the conversation becomes measurable instead of subjective.
If you inherit an existing sign system, start by checking whether the type size and placement distance match each other. Many older systems fail because they kept the same small type while corridors got longer and busier.
When you standardize heights, document exceptions, because exceptions are where maintenance teams get confused later. A consistent system with a few well-justified exceptions is better than a system where every sign is a one-off.
Remember that placement targets also affect cleaning, impacts, and wear, especially in industrial and school environments. A sign placed in a cart strike zone will look bad quickly, and the best typography in the world will not save it.
Reassurance signs: confirming you’re still on the right route
Reassurance signs are the quiet workhorses of decision point wayfinding, because they prevent backtracking. People get anxious in long corridors and big campuses, so they look for confirmation that they did not miss a turn.
A simple “Radiology this way” after the first turn can cut down on questions at the information desk. In logistics settings, reassurance signs keep drivers and pickers moving when aisles look identical.
Place reassurance signs after a turn and then again after long stretches with no other cues, like a 200 foot hallway or a ramp to a parking deck. If you wait until the next intersection, you force people to hold uncertainty for too long.
Do not overload reassurance signs with full directories, because they are meant to be read in a glance. Keep them focused on the route people are already on, and save the full list for the lobby map or the elevator core.
Reassurance signs also help when the environment looks wrong, like a service corridor that still happens to be the correct path to a public destination. A small confirmation message can keep people from turning around just because the finishes changed.
They are especially useful after elevators, because people step out and need immediate confirmation they chose the right floor. If the first thing they see is silence, they start scanning door numbers and guessing.
In large campuses, reassurance can be a simple zone marker, like “North Wing” or “Building B,” placed where people can see it without stopping. Zone markers reduce cognitive load because the user only has to be right at the zone level before they get more specific directions.
Reassurance signs can also reduce staff interruptions in security-controlled areas, because they keep visitors from wandering into the wrong corridor looking for clues. When people feel confident, they are less likely to test doors.
A good test is to ask whether a person could walk the route with their head up, only glancing at signs when needed. If they have to stop repeatedly to confirm, you probably need more reassurance or better placement.
When budgets are tight, prioritize reassurance on the longest and most monotonous segments, because that is where doubt grows. A single well-placed confirmation can do more than three signs clustered at the next intersection.
Handling intersections with multiple options
Intersections with three or more options are where wayfinding breaks, because people freeze and start scanning in circles. Your job is to reduce the choice set by naming the best known destinations and grouping the rest.
Start by ranking destinations by frequency, urgency, and risk, like Emergency, Admissions, and Parking in a hospital. Then use a secondary panel or a nearby directory for lower demand destinations, like Administration or Conference Rooms.
At complex nodes, you often need more than one sign face so each approach has a clean line of sight. A sign that works for northbound traffic can be useless for southbound traffic, even when it hangs in the same physical spot.
Use arrows consistently, and do not get cute with diagonal arrows that point into corners. If the route requires two steps, like left then immediate right, call it out with a short note or split the instruction into two signs placed in sequence.
When there are multiple options, people also look for landmarks, so your placement should take advantage of obvious features like a stair, a reception desk, or a big artwork. If the sign is placed where the landmark blocks it, you lose the benefit of that natural orientation point.
It helps to separate “where to go now” from “what is down each corridor” because those are different questions. A directional sign should tell the user the next move, while a directory can explain the full layout for those who want to study it.
In facilities with repeated intersections, like long spines with identical cross corridors, you need consistent sign placement so users learn the pattern. If one intersection has an overhead sign and the next has only a wall plaque, people stop trusting the system.
Do not assume that people will walk to the center of an intersection before looking for a sign. Many users start scanning while they are still approaching, so the sign needs to be visible before they enter the node.
When the intersection includes doors, like a set of double doors that look like an exit, users may interpret that as a route boundary. A sign placed just before that door can prevent the common mistake of turning away from the correct path.
If you have to list many destinations, use grouping that matches how people talk, like “Clinics” versus “Departments,” rather than internal org charts. A user does not care that two clinics report to different divisions, they care that both are on the same wing.
Finally, remember that intersections are where stress shows up, so clarity beats completeness. If the sign helps 90% of users make the right move quickly, the remaining 10% can be supported by a nearby directory or staff assistance.
Coordinating overhead signs with wall and floor cues
Overhead signs are great for long range guidance, but they should not be the only cue at a decision point. People look up at different rates, and in a busy corridor they may keep their eyes on traffic, carts, and door openings.
Wall signs work well for close range confirmation, especially near doorways and elevator lobbies where people naturally slow down. Floor cues like colored lines can help in large facilities, but they must match the sign messages and terminate cleanly at destinations.
Plan the hierarchy so the overhead sign gets you to the correct zone and the wall sign gets you to the exact room or dock door. If both signs repeat the same content at the same distance, you waste budget and still miss the real decision point.
Coordinate placement so a person can see the next cue before the current cue leaves their field of view. That overlap is a practical way to apply line of sight planning without turning the project into a simulation exercise.
When overhead and wall cues are coordinated, users stop doing the full stop-and-spin behavior at intersections. They glance up for the big move and then glance to the wall for the final confirmation.
Floor cues should be treated like reassurance, not like the primary instruction, because floors get dirty and wear out. If the line is the only thing telling someone to turn, maintenance becomes a wayfinding risk.
If you use color, make sure the color is visible under the actual lighting and flooring materials, not just on a brand sheet. Some polished floors and LED lighting temperatures can flatten contrast and make a route color look gray.
Overhead signs should not be placed where people must stand under them to read them, because that creates congestion. If users have to stop directly below the panel, the sign is too late or too small.
Wall signs should be placed where people can step aside to read without blocking the flow, especially in narrow corridors. A sign placed on the inside corner of a turn can create a bottleneck because everyone clusters at the same spot.
Digital kiosks and maps can support the system, but they do not replace physical cues at decision points. People do not want to consult a screen for every turn, they want the building to guide them as they move.
The best coordination happens when the message set is planned first and the sign types are chosen second. If you start with sign types, you end up forcing messages into formats that do not fit the moment of use.
Walkthrough audits: how you spot missing or late signs
A walkthrough audit is the fastest way to find gaps in wayfinding signage placement guidelines, because it exposes where people hesitate. Bring a printed route list, a phone camera, and someone who has never been to the site if you can.
Do the audit at least twice, once during quiet hours and once during peak activity when carts, lines, and doors change movement patterns. A sign that reads fine at 8 a.m. can vanish at noon when a queue forms under it.
Mark three kinds of problems, missing signs, late signs, and contradictory signs. Late signs are the sneakiest, because the content is correct but the placement forces a stop, a head turn, or a backtrack.
Take photos from the approach angle, not straight on, because that is what the user sees. When you review the photos later, you will spot obstructions and glare that were easy to ignore in person.
During the walkthrough, pay attention to where people naturally slow down, because that is where they are open to information. If you place a sign in a spot where everyone speeds up, you are fighting momentum.
Listen for the small behaviors, like someone whispering a destination name to themselves or checking their phone again. Those are signs that the environment did not provide enough confirmation.
Audit the return routes as well, because many systems are designed for arrival only. Exiting a building often has different decision points, especially when elevators and stairs are separated or when doors are one-way.
If the facility has multiple user groups, audit as each group, because staff routes and visitor routes do not overlap perfectly. A sign that is perfect for staff can be invisible to visitors if it is placed inside a badge-controlled vestibule.
When you find a problem, resist the urge to solve it with more words. Most audit fixes are about moving a sign earlier, rotating it toward the approach, or adding a simple reassurance message.
After the audit, translate findings into a punch list that includes exact locations and approach directions, not just “add sign near elevators.” If the installer has to guess, the sign will drift away from the decision point again.
Handling intersections with multiple options
Some intersections look simple on paper but behave like complex nodes because of traffic patterns and door placement. When people approach from a side corridor, they often miss a sign aimed at the main corridor, so you need a second face or a different mounting location.
Use decision point wayfinding logic to decide where to repeat information, and do not rely on memory. If a person must remember “third left after the elevators,” the system failed at placement, not at literacy.
When there are many similar destinations, like Dock 1 through Dock 20, assign zones and then count within the zone. A sign that says “Docks 1 to 10” at the first split is more useful than listing ten arrows that nobody can parse while walking.
In public buildings, you can borrow this approach for clinics, classrooms, or offices by grouping into suites or wings. People accept grouping when it matches the building layout and the naming is consistent on doors and directories.
Another tactic is to use a primary destination to pull people through the node, like “Main Lobby” or “Shipping Office,” and then use smaller cues for the sub-destinations. People can follow a main anchor and then refine their route later.
Be careful with too many arrows on one panel, because arrows become a blur when users are moving. If you cannot make the message scannable, split the content into two signs placed a few steps apart.
When you have a long list of options, consider whether the intersection needs a map instead of more text. A simple “You are here” diagram can reduce confusion faster than adding another column of destinations.
In facilities with repeated numbering, like rooms 100 to 199, users often want reassurance that they are moving in the right numeric direction. A small range marker at the intersection can prevent the classic mistake of walking toward decreasing numbers.
If the intersection includes a change in environment, like carpet to tile or public to back-of-house finishes, users may interpret that as a boundary they should not cross. A sign placed right at that material change can clarify that the route continues.
When you fix a complex node, test it from every approach, because the “easy” approach can hide problems on the “hard” approach. The hard approach is usually the one your regular staff never uses, which is why it stays broken.
Coordinating overhead signs with wall and floor cues
Mixed cue systems fail when teams treat them as separate projects, with one vendor doing overhead and another doing wall plaques. You need one placement plan that calls out sign placement height, viewing distance, and the exact decision point for each message.
Floor lines and painted zones work best when they support a small number of primary routes, like “Emergency,” “Main Lobby,” or “Visitor Parking.” If you try to encode every destination into color, the floor becomes visual clutter and the signs lose authority.
Overhead signs should land where the corridor opens up, because that is where people can look up without stepping into someone’s path. Wall signs should land where people naturally stop, like at a door pull, elevator call button, or reception counter.
If you use icons, keep them consistent across all cue types, including floor stencils and digital kiosks. A forklift icon that means “shipping” on one sign and “loading” on another makes the placement argument irrelevant.
Coordinate terminology across cues as well, because a floor line labeled “Diagnostics” does not help if overhead signs say “Imaging.” People will assume they are different destinations and hesitate at the next decision point.
When you have both overhead and wall signs, decide which one owns the arrow at each node. If both signs give arrows but they are not aligned, users will trust neither.
Floor cues should be placed so they do not get interrupted by thresholds, mats, and door saddles that visually break the line. A route line that disappears at every doorway teaches people that the system is unreliable.
Overhead signs should be coordinated with lighting so the face is evenly lit without hotspots. If the sign is readable only from one side because of glare, the placement is doing extra work for no reason.
Wall signs near doors should be coordinated with door hardware and glazing so the sign is not hidden by a pulled-open door or a privacy curtain. A sign can be perfectly placed and still be blocked by daily operations.
When you coordinate cues, you also coordinate maintenance, because different cue types age differently. If the floor line is faded but the overhead sign is crisp, users will still doubt the route because the weakest cue sets the trust level.
The simplest coordination check is to stand at a decision point and ask if the overhead cue, wall cue, and any floor cue tell the same story in the same direction. If you have to interpret, the user will have to interpret too.
Walkthrough audits: how you spot missing or late signs
During audits, measure what matters, which is the distance from the decision point to the first readable instruction. You can do this with a tape measure, a laser, or pacing, as long as you record it consistently.
Track sign placement height at the same time, because a sign that is too high can be invisible even when it sits in the right location. In areas with tall racks or stacked goods, you may need to raise the sign but also increase letter height to keep it readable.
Also record whether the sign is readable while moving, because a sign that requires a full stop changes traffic behavior. When people stop in a corridor, they create secondary problems like congestion and near-misses.
Pay attention to the first-time user experience, because regular staff will unconsciously correct for missing signs. If your test user keeps asking, “Is this right?” that is the system telling you where reassurance is missing.
When you find contradictions, trace them back to the source, which is often naming changes or departmental moves. A placement fix will not solve a naming conflict if two teams use different destination labels.
Document the approach direction for every photo, because a sign can work from one direction and fail from the other. Without that context, a photo review can lead to the wrong fix.
Do not ignore small handwritten signs and taped arrows, because they are evidence of a missing official cue. If people keep making their own signs, the building is telling you where the real decision points are.
After changes are made, do a quick re-audit of the same routes, because fixes can create new problems downstream. When you move a sign earlier, you may need a reassurance sign later to complete the promise.
- Mark every decision point on a route map
- Photograph each approach angle at walking speed
- Note obstructions, glare, and seasonal displays
- Record sign placement height and bottom clearance
- Measure advance notice distance before each turn
- Log contradictions between overhead and wall messages
- Flag spots where people stop and look around
If you keep these notes in a shared log, you can track improvements over time instead of repeating the same debates each year. A good audit record becomes a maintenance tool, not just a project document.
Audits also help justify budget, because you can tie fixes to measurable outcomes like fewer wrong turns and fewer staff interruptions. When leadership sees that signage reduces friction, placement stops being a cosmetic line item.
Conclusion
Wayfinding works when placement respects the moment a person decides, not when the sign happens to fit a clean spot on the wall. If you commit to decision point wayfinding, line of sight planning, and realistic sign placement height targets, the system starts paying off fast.
Use walkthrough audits to catch late signs, blocked signs, and confusing intersections before users do. The best wayfinding signage placement guidelines read like common sense, because they are built around how people move through real buildings.
When you place signs where people actually decide, you reduce questions at desks, reduce wandering in secure areas, and reduce stress in time sensitive settings. That is the standard worth chasing, even when it forces you to move a sign that looked perfect on the elevation drawing.
Placement discipline also makes future updates easier, because you can swap messages without reinventing the system each time a department changes names. When the decision points are mapped and respected, the building stays navigable even as operations evolve.
If you remember one rule, make it this, the sign should appear when the question appears. Everything else, fonts, colors, and materials, supports that timing.